
That old chandelier gathering dust? It might be time to give it a new lease on life. Instead of letting it fade into the background, a little attention can bring back its sparkle. This guide is all about chandelier refurbishment, covering everything from figuring out what needs fixing to making it shine again. We'll walk through the steps, share some tricks, and help you decide when it’s best to call in the pros. Get ready to see your light fixture in a whole new light!
Key Takeaways
- Understand your chandelier's style and condition before starting any refurbishment work.
- Gather the right tools and set up a safe workspace to avoid accidents and damage.
- Follow a step-by-step cleaning and polishing process to restore shine and remove grime.
- Consider advanced techniques like rewiring or metal refinishing for a complete restoration.
- Regular maintenance is key to keeping your refurbished chandelier looking its best.
Assessing Your Chandelier's Needs
Before you even think about grabbing a duster or a polishing cloth, it's super important to really look at your chandelier. It's not just about making it shiny again; it's about understanding what it needs to keep looking good and working right for years to come. Think of it like a check-up for your fancy light fixture.
Understanding Different Chandelier Styles and Care
Chandeliers aren't all the same, not by a long shot. The way you clean and care for a big, sparkly crystal number is going to be way different from, say, a simple modern metal one. You've got everything from those old-school, multi-tiered beauties with tons of little glass arms to sleek, minimalist designs that might just have a few bulbs. Each material and style has its own quirks.
- Crystal Chandeliers: These are the divas. They need a gentle touch. You'll want to use special cleaners or a mix of water and vinegar, and be super careful not to chip or scratch the crystals. Each piece might need to be taken off and cleaned individually.
- Metal Chandeliers: Depending on the metal (brass, bronze, iron), you might need specific polishes. Some finishes can be damaged by harsh chemicals, so always test in a small spot first.
- Modern/Minimalist Chandeliers: These are often easier. They might have fewer parts and simpler lines, making dusting and wiping down more straightforward. Just watch out for delicate bulbs or exposed wiring.
- Fabric Shade Chandeliers: If your chandelier has fabric shades, you'll need to be extra careful. Dusting is usually fine, but for stains, you might need a fabric-specific cleaner or even professional cleaning.
Knowing your chandelier's specific style and the materials it's made from is the first step to making sure you don't accidentally damage it while trying to spruce it up. It's all about treating it right.
Identifying Signs of Wear and Tear
Okay, so your chandelier might look okay from across the room, but up close, things can tell a different story. You've got to be a bit of a detective here.
- Dust and Grime Buildup: This is the most obvious one. If it looks dull or has visible layers of dust, it's time for a clean. This isn't just about looks; heavy dust can actually affect how well the light shines.
- Loose Components: Gently wiggle parts of the chandelier. Are any crystals loose? Do any arms feel wobbly? Anything that moves when it shouldn't is a red flag.
- Fading or Discoloration: Look at the metal parts. Are they losing their shine? Is there any green or black tarnish? This indicates the finish is degrading.
- Damaged Crystals or Parts: Check for any chips, cracks, or missing pieces. Even small imperfections can detract from the overall look.
- Electrical Issues: Flickering lights, bulbs burning out too quickly, or strange smells are serious signs that the wiring might be old or faulty. This is the most critical thing to look out for, as it can be a safety hazard.
When to Seek Professional Chandelier Refurbishment
Sometimes, you just know when a job is too big or too risky for a DIY project. Chandeliers can be tricky, and messing them up can be expensive, or worse, dangerous.
- Very Large or Intricate Chandeliers: If your chandelier is massive, has hundreds of tiny crystals, or is incredibly complex in its design, it might be best to let the pros handle it. They have the right equipment and experience to manage these delicate giants.
- Antique or Valuable Chandeliers: If you have a family heirloom or a particularly old and valuable piece, you don't want to risk damaging it. Professionals who specialize in antique restoration know how to handle these precious items with the care they deserve.
- Electrical Problems: If you notice any signs of electrical trouble – flickering lights, buzzing sounds, or if the fixture seems to be overheating – it's time to call in an expert. Rewiring is not a DIY job for most people.
- Structural Damage: If the main frame of the chandelier seems bent, cracked, or unstable, it needs professional attention to ensure it can be safely rehung.
- You're Uncomfortable or Unsure: Honestly, if you're feeling overwhelmed, nervous, or just not confident about tackling the refurbishment yourself, it's perfectly okay to hire someone. Your peace of mind is worth it.
Essential Tools and Preparations for Chandelier Refurbishment
Before you even think about touching a crystal or a wire, getting your ducks in a row is super important. It’s not just about having the right stuff; it’s about making sure you don’t end up with a broken chandelier or a trip to the emergency room. Think of it like prepping for a big cooking project – you wouldn't start chopping without your knives and ingredients, right? Same idea here.
Gathering Necessary Tools and Supplies
So, what exactly do you need? It’s a bit of a mix, depending on how deep you’re going with the refurbishment. For a basic clean, you’ll want soft, lint-free cloths (microfiber is your friend here), maybe some cotton swabs for those fiddly bits, and a mild cleaning solution. If you’re planning on doing more, like rewiring or fixing metal parts, you’ll need a more extensive kit. Having a good, sturdy ladder that reaches comfortably is non-negotiable. You don't want to be stretching precariously.
Here’s a quick rundown of what you might need:
- Cleaning: Microfiber cloths, cotton swabs, mild soap or a vinegar-water mix, gloves.
- Minor Repairs: Small screwdrivers, pliers, wire strippers (if rewiring), electrical tape, voltage tester.
- Safety: Safety glasses, sturdy ladder, drop cloth or old sheets.
- Documentation: Camera or smartphone for taking pictures.
Creating a Safe Workspace
This is where safety really comes into play. First things first, turn off the power to the chandelier at the circuit breaker. Don't just flip the light switch; you need to cut the power at the source. Then, lay down a drop cloth or some old sheets directly underneath the chandelier. This will catch any dust, debris, or accidental drips, saving you a ton of cleanup later. Make sure your ladder is on a stable, level surface. If you’re working in a high-traffic area, consider putting up some temporary barriers to keep curious pets or kids away while you’re working.
Documenting Your Chandelier's Structure
This step is a lifesaver, especially if your chandelier has a lot of crystals or intricate parts. Before you start taking anything apart, grab your phone or camera and take a bunch of pictures. Get shots from different angles, close-ups of how the crystals are attached, and how the main components connect. If you’re removing parts, label them as you go. This visual record will be your best friend when it’s time to put everything back together. Trust me, trying to remember where that one specific crystal went is a recipe for frustration.
Working on a chandelier can feel a bit like being an archaeologist. You're carefully uncovering layers, documenting as you go, and piecing things back together. Patience and a methodical approach are key to a successful restoration.
The Step-by-Step Chandelier Refurbishment Process

So, you've assessed your chandelier and you're ready to roll up your sleeves. This part is all about getting your fixture sparkling again, piece by piece. It might seem a bit daunting, especially if it's an older, more intricate model, but taking it step-by-step makes it totally manageable. The key is patience and a gentle touch.
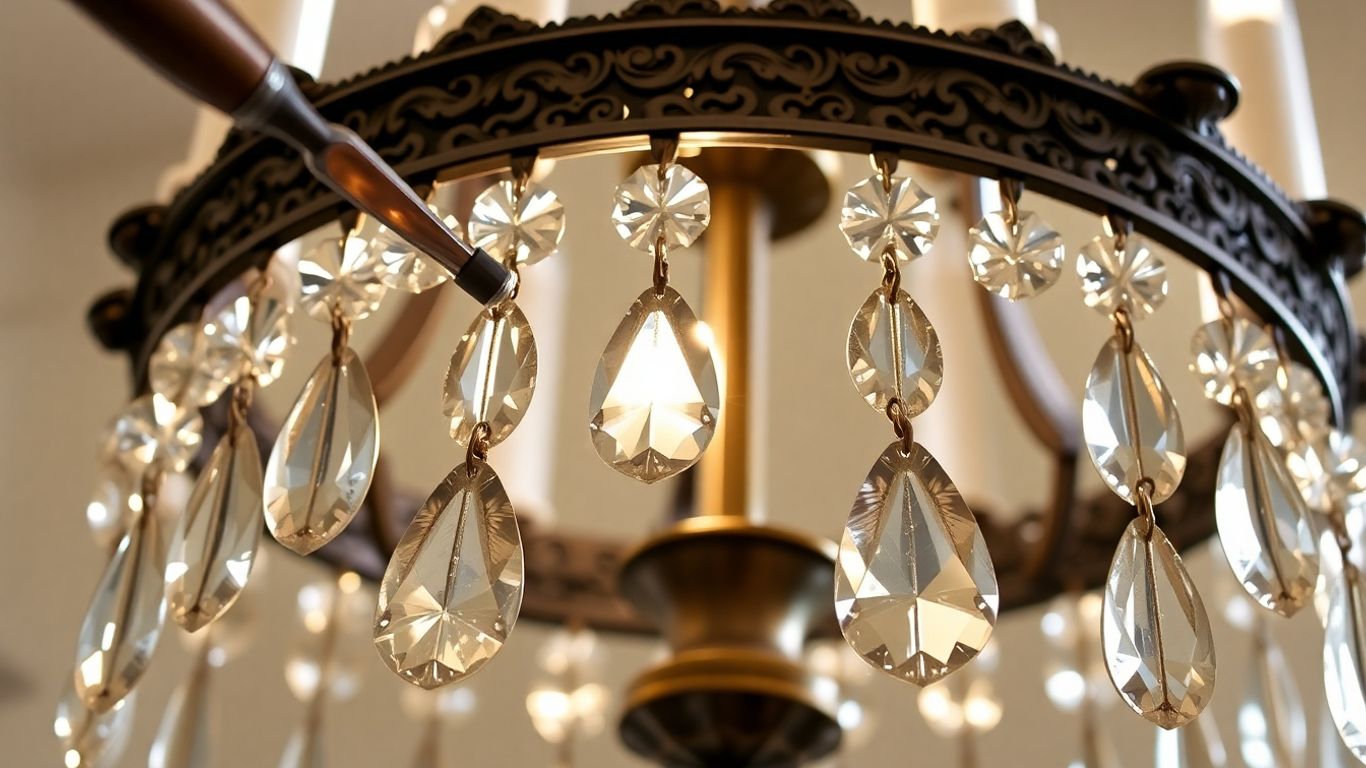
Gentle Dusting and Cleaning Techniques
First things first, let's get rid of the surface dust. You don't want to grind that into the metal or crystals. A soft feather duster or a clean, dry microfiber cloth is your best friend here. Start at the very top of the chandelier and work your way down. This way, any dust you dislodge will fall onto areas you haven't cleaned yet. For those trickier spots, like where arms meet the central body, a small, soft brush (like a clean paintbrush or even a soft toothbrush) can get into those nooks and crannies.
If you find some grime that dusting won't budge, it's time for a mild cleaning solution. A simple mix of water and a tiny bit of dish soap, or a 50/50 solution of white vinegar and water, works wonders. Always dampen your cloth, never spray directly onto the chandelier, especially near electrical components. Wring out the cloth really well so it's just barely damp. Gently wipe down each component, paying attention to any build-up. For crystal arms or pendants, you might need to carefully remove them for a more thorough clean. If you do, take a quick photo beforehand so you know exactly where they go back!
Addressing Intricate Components and Crystals
This is where the real magic happens, but also where you need to be extra careful. Crystals, in particular, can be delicate. If you've removed them, clean them individually. A soft cloth with your mild cleaning solution is usually enough. For very stubborn spots on crystals, a cotton swab dipped in the solution can be helpful. Just be sure to dry them thoroughly with a clean, soft cloth afterward to prevent water spots.
Don't forget the smaller details – the chain links, the decorative finials, the candle covers (if applicable). These often get overlooked but contribute a lot to the overall look. Use your soft brush or a damp cloth to carefully clean each one. If your chandelier has any fabric elements, like shades, spot clean them gently with a mild detergent and let them air dry completely.
Polishing for a Brilliant Finish
Once everything is clean and dry, it's time to bring back that shine. For metal parts, a good quality metal polish can make a world of difference. Choose a polish that's appropriate for the type of metal your chandelier is made from – brass, bronze, nickel, etc. Apply a small amount to a soft cloth and gently rub the metal components. Buff with a clean, dry cloth until you achieve a nice gleam. Be careful not to get polish on any painted or patinated finishes, as it can damage them.
For the crystals, a final buff with a dry microfiber cloth will remove any lingering smudges and make them sparkle. It's amazing how much brighter and more vibrant your chandelier will look after this final step. It’s like giving it a whole new lease on life!
Remember to work in good lighting and take your time. Rushing can lead to dropped crystals or scratched metal. It's a labor of love, but the result is so worth it.
Advanced Chandelier Refurbishment Techniques
Sometimes, a simple dusting just won't cut it. For those chandeliers that have seen better days, or for those truly special antique pieces, you might need to go a bit deeper. This is where advanced techniques come into play, focusing on safety, functionality, and bringing back that original sparkle.
Professional Rewiring for Safety and Functionality
Old wiring can be a real hazard. It can fray, become brittle, or just not meet current safety standards. Having your chandelier rewired by a professional is one of the most important steps you can take to ensure it's safe to use. Professionals use up-to-date, approved components to make sure everything is up to code. This isn't just about preventing fires; it's about making sure your beautiful fixture actually works as it should.
Here's a quick look at what professional rewiring often involves:
- Inspection: A thorough check of all existing wires and connections.
- Replacement: Swapping out old, worn-out wires with new, safe ones.
- Socket and Switch Repair/Replacement: Fixing or replacing any faulty sockets or switches.
- Testing: Making sure all connections are secure and the fixture works correctly.
Restoring Antique Chandelier Brilliance
Antique chandeliers are often works of art. They have a history and a certain charm that modern pieces just can't replicate. Restoring them requires a delicate touch and a deep respect for their original craftsmanship.
- Crystal Care: Each crystal might need individual attention. Sometimes, they lose their sparkle over time. Gentle cleaning solutions, often a mix of water and vinegar, can help bring back their shine without damaging them.
- Metal Restoration: Brass, bronze, or other metals can tarnish. Professionals use specific polishes and treatments to clean and restore the metal without removing its patina, which is often part of its antique appeal.
- Structural Integrity: Checking for loose arms, damaged frames, or other structural issues is key. These are often repaired using methods that match the original construction.
Restoring an antique chandelier is more than just cleaning; it's about preserving a piece of history. It involves understanding the materials, the construction techniques of the era, and using methods that honor the original design. The goal is to make it look its best while maintaining its authentic character.
Repairing and Refinishing Metal Components
Metal parts on any chandelier, especially older ones, can suffer from tarnish, corrosion, or even physical damage. Bringing these back to life can make a huge difference in the overall look of the fixture.
- Cleaning: Removing dirt, grime, and light tarnish is the first step. Soft brushes and mild cleaning agents are usually best.
- Polishing: For a brighter finish, specific metal polishes are used. The type of polish depends on the metal – brass polish for brass, silver polish for silver, and so on.
- Refinishing: If the original finish is heavily damaged or worn away, refinishing might be necessary. This could involve repainting, re-plating, or applying a protective coating to restore the metal's appearance and prevent further damage.
Maintaining Your Refurbished Chandelier
So, you've put in the work to get your chandelier looking spiffy again. Awesome! But the job isn't quite done yet. Keeping it that way is the next big step, and honestly, it's not as hard as you might think. A little regular attention goes a long way in keeping that sparkle alive and making sure your chandelier stays a beautiful part of your home for years to come.
Implementing a Regular Cleaning Schedule
Think of this like brushing your teeth – you wouldn't wait until they're practically falling out, right? Same idea with your chandelier. Aim to give it a good dusting at least every couple of months. A more thorough cleaning, maybe involving taking off some crystals, should happen about twice a year. It sounds like a lot, but if you spread it out, it's really not a huge chore. Plus, it stops dust and grime from building up into something truly stubborn.
Here’s a simple schedule to consider:
- Monthly: Quick dusting of accessible parts with a soft cloth or duster.
- Quarterly: A more detailed dusting, including gently wiping down crystals.
- Semi-Annually: Full cleaning, potentially involving removing and cleaning individual crystals and checking connections.
Choosing the Right Cleaning Agents
This is where you can really mess things up if you're not careful. Avoid harsh chemicals like ammonia or abrasive cleaners at all costs. They can damage finishes, cloud crystals, and even weaken the metal parts over time. For most chandeliers, a simple mix of water and a tiny bit of mild dish soap or white vinegar is your best bet. Always test any cleaning solution on an inconspicuous spot first.
For those delicate crystal drops, a solution of equal parts water and distilled white vinegar in a spray bottle works wonders. Just lightly mist a soft cloth, not the crystal directly, and wipe gently. For metal parts, a specialized metal polish designed for the type of metal your chandelier is made from is usually safe, but again, test it first.
When in doubt, less is more. A gentle wipe with a dry microfiber cloth can often remove surface dust without needing any liquids at all. This is especially true for antique pieces or those with delicate patinas.
Proactive Care for Long-Term Radiance
Beyond just cleaning, a little proactive care can prevent bigger issues down the line. Periodically (maybe once a year), give your chandelier a good once-over. Check for any loose wires, wobbly arms, or crystals that seem to be hanging precariously. If you notice anything concerning, especially with the electrical components, it's time to call in a professional. It's much better to catch a small issue early than to wait for a major problem to occur. Also, be mindful of where you place things in the room – you don't want to be constantly bumping into your beautiful chandelier when you're moving furniture or dusting other items.
Choosing the Right Chandelier Refurbishment Services
So, you've put in the work, maybe even tackled some of the cleaning yourself, and now you're looking at your chandelier thinking, 'This needs a professional touch.' That's totally understandable. Chandeliers aren't just lights; they're often the star of the show in a room, and getting them right is important. When you decide to bring in the pros, you want to make sure you're picking the right people for the job. It's not just about making it shiny again; it's about preserving its beauty and making sure it's safe.
Evaluating Professional Expertise
When you're looking for someone to work on your chandelier, you'll want to find folks who really know their stuff. Think about it: these are often delicate, sometimes antique, pieces. You don't want just anyone messing with them. Look for services that talk about their experience with different types of chandeliers, especially if yours is a bit unusual or old. Do they mention specific training or certifications? That's usually a good sign. It's also helpful if they have a portfolio or examples of work they've done. Seeing before-and-after pictures can give you a real sense of their skill.
Understanding Service Offerings
Different places will offer different things, so it's good to know what you need. Are you just looking for a deep clean, or does your chandelier need some repairs? Maybe the wiring is old and needs updating for safety. Some services might focus just on cleaning, while others offer a full restoration package, which could include fixing bent arms, replacing missing crystals, or even re-plating metal parts. It's worth making a list of what your chandelier needs before you start calling around. This way, you can ask specific questions and find a service that matches your needs.
Here's a quick look at common services:
| Service Type | Description |
|---|---|
| Cleaning | Dusting, washing, and polishing of all components, including crystals. |
| Rewiring | Replacing old or damaged electrical wiring for safety and functionality. |
| Repair | Fixing broken arms, loose sockets, or other structural damage. |
| Refinishing | Restoring metal components to their original look through polishing or plating. |
| Crystal Replacement | Sourcing and fitting replacement crystals for missing or damaged ones. |
Ensuring Safe and Secure Reinstallation
This is a big one. After your chandelier has been cleaned, repaired, or restored, it needs to be put back up. This isn't a simple DIY job for most people. You want to be sure it's hung securely and that all the electrical connections are sound. A professional service should handle this part with care, making sure the chandelier is balanced correctly and safely attached to the ceiling. A properly reinstalled chandelier is not only beautiful but also safe for your home. Don't hesitate to ask about their reinstallation process and what safety checks they perform. It's the final step that brings everything together and lets you enjoy your revitalized centerpiece without worry.
When you're choosing a service, think about more than just the price. Consider their reputation, the quality of their work, and how comfortable you feel with them handling your treasured fixture. A good service will make the whole process feel smooth and reassuring.
Bringing Back the Sparkle
So there you have it, a rundown on how to get your chandelier looking its best again. Whether you tackled a simple dusting or a full crystal reattachment, you've probably learned a thing or two about your fixture. Remember, a little regular care goes a long way in keeping that statement piece shining bright and adding that special something to your room. If things got a bit too tricky, or if your chandelier is particularly old or fancy, don't be afraid to call in the pros. They've got the tools and know-how to handle the really delicate jobs. But for most of us, a bit of elbow grease and patience can make a world of difference. Now go on, enjoy that beautifully lit space!
Frequently Asked Questions
How often should I clean my chandelier?
It's a good idea to give your chandelier a good cleaning at least twice a year. This helps stop dust and grime from building up, which makes the job much easier in the long run and keeps your chandelier looking its best.
What cleaning supplies should I avoid?
You should definitely stay away from cleaners that have ammonia in them. These can be too harsh and might strip the finish off the metal parts that hold the crystals. It's better to use gentler options to keep your chandelier looking great.
Can I clean my chandelier myself, or should I hire someone?
For most chandeliers, especially if they aren't too high or complicated, you can clean them yourself with basic supplies. However, if your chandelier is very large, has lots of tiny, delicate parts, or is an antique, it's safer to call in a professional who has the right tools and experience.
What are some quick ways to keep my chandelier clean between deep cleanings?
If you're short on time, a magnetic duster can be super handy. It lets you quickly dust both sides of the crystals at the same time. These little tricks can help your chandelier stay shiny without taking up a lot of your day.
What should I do if my chandelier looks like it has electrical problems?
If you notice any issues with the wiring, like loose connections, it's really important to get it checked out by a professional right away. Messing with electrical problems yourself can be dangerous, so it's best to let an expert handle it to ensure safety.
What's the benefit of having a professional refurbish my chandelier?
Professionals have the special skills and tools to carefully clean, repair, and even rewire your chandelier, especially if it's old or has complex parts. They can restore its original beauty and make sure it's safe to use, which can be tricky to do on your own.


