
So, you've picked out the perfect chandelier. Now comes the part that might seem a little intimidating: getting it wired up. Don't worry, it's totally doable with the right approach. We're going to break down the process of wiring a chandelier diagram so you can get that beautiful light fixture shining in your home. It's not as complicated as it looks, and with a little patience, you'll be enjoying your new centerpiece in no time.
Key Takeaways
- Understanding the basic parts of a chandelier's wiring system, like the main power, wires leading to each bulb, and the ceiling connection box, is the first step.
- Knowing what the different wire colors mean – usually black for hot, white for neutral, and green or bare copper for ground – is super important for safety and correct hookup.
- You'll need a few tools for this job, think basic screwdrivers and wire strippers, plus safety gear like gloves and eye protection.
- When you're actually wiring a chandelier diagram, you'll connect the fixture's wires to the corresponding wires in your ceiling box, making sure everything is secure.
- If you run into problems like flickering lights or if you're just not feeling confident, it's always a good idea to call in a professional electrician.
Understanding Chandelier Wiring Fundamentals
Alright, let's get down to the nitty-gritty of how these fancy lights actually work. When you're looking at a chandelier, it's not just about the sparkle; there's some electrical magic happening behind the scenes. Understanding the basics here will make the whole installation process, and any future troubleshooting, way less intimidating. Think of it like learning the alphabet before you can write a novel – you gotta know the letters first.
So, what's actually inside that beautiful fixture that makes the lights turn on? It's a system, and like any system, it has its parts. You've got the main power coming in, usually from your ceiling. This power then travels through wires, which are often hidden away inside the chandelier's arms or body so you don't see a mess of cords. These wires lead to the sockets where your light bulbs screw in. Sometimes, there are extra bits like dimmer switches or even remote controls, which can add a few more wires to the mix, making things a bit more complex.
- Power Source: This is where the electricity comes from, typically your home's main electrical panel.
- Wiring: Insulated copper wires that carry the electricity. They're usually hidden within the fixture.
- Sockets: These hold the light bulbs and connect them to the wiring.
- Connectors: Things like wire nuts that join wires together safely.
- Ground Wire: A safety wire, usually green or bare copper, that provides a path for electricity in case of a fault.
The way these components are put together is designed to be safe and functional, but it relies on each part doing its job correctly. If one piece is off, the whole thing can act up.
This is super important, and honestly, it's where a lot of confusion can happen if you're not paying attention. Electrical wires come in different colors, and these colors aren't just for show; they tell you what the wire does. Getting these colors right is key to a safe and working installation.
Here's a general rundown, though it's always best to check your specific fixture's manual and local electrical codes, as things can vary slightly:
| Wire Color | Typical Function |
|---|---|
| Black | Hot (Live) |
| White | Neutral |
| Green or Bare Copper | Ground |
Sometimes you might see other colors, like red, blue, or yellow, especially in more complex setups or older homes. These often indicate switched hot wires or wires used for different circuits. For a standard chandelier, though, you're mostly dealing with black, white, and green/bare.
Think of the junction box as the central meeting point for electricity in your ceiling. It's usually a metal or plastic box that's securely attached to the ceiling joist. This is where the main power supply from your house wires connects to the wires coming down from your chandelier. It's a safety feature, designed to contain any sparks or heat that might occur from a loose connection, preventing fires. When you're installing a chandelier, you'll be making your wire connections inside this box. It needs to be sturdy enough to support the weight of the fixture, too, especially for heavier chandeliers.
- Connection Point: Where house wiring meets chandelier wiring.
- Safety Enclosure: Protects against electrical faults.
- Support Structure: Holds the weight of the fixture via the mounting bracket.
Getting these fundamentals down will make the next steps feel a lot more manageable. It’s all about understanding the flow of electricity and how each part plays its role.
Essential Tools for Wiring a Chandelier Diagram
Alright, let's talk tools. You can't just grab any old screwdriver and expect to wire up a fancy chandelier. It's like trying to bake a cake with just a whisk – you'll probably end up with a mess. Having the right gear makes the whole process smoother and, more importantly, safer. So, before you even think about touching those wires, let's get you kitted out.
These are your everyday workhorses. You probably have most of these lying around, but it's good to double-check they're in decent shape.
- Screwdrivers: You'll want a few different sizes, both flathead and Phillips. Make sure they have insulated handles – that's a big one for safety.
- Wire Strippers: These are specifically designed to cut away the plastic coating on wires without nicking the metal inside. Trying to do this with scissors or a knife is a recipe for disaster.
- Pliers: Needle-nose pliers are super handy for gripping small wires or bending them into shape. Regular pliers can also be useful.
- Voltage Tester: This is non-negotiable. It's a simple tool that tells you if a wire is live (has electricity running through it) or not. Always, always, always test for power before you touch any wires.
These might be a bit more specific, but they'll make your chandelier wiring job much easier.
- Wire Nuts: These little plastic caps screw onto the ends of wires to join them together securely and safely. You'll get different sizes depending on how many wires you're connecting.
- Electrical Tape: Good quality electrical tape is essential for insulating any exposed wires or securing connections. Don't skimp on this – get the stuff made for electrical work.
- Ladder or Step Stool: Unless you're incredibly tall, you'll need a stable way to reach your ceiling. Make sure it's sturdy and placed on a level surface.
- Flashlight or Headlamp: It can get pretty dim working up in a ceiling, so having a good light source is key to seeing what you're doing.
Safety first, always. Electricity is no joke, and a little preparation goes a long way.
- Safety Glasses: Protect your eyes from any stray bits of wire or debris.
- Work Gloves: While not strictly necessary for all wiring, they can offer a bit of protection and grip, especially if you're working with rough materials.
- Non-Conductive Shoes: If you have them, wear shoes with rubber soles. It adds another layer of protection against stray electricity.
Remember, the most important tool you have is your brain. Always think through what you're doing, double-check your connections, and if you're ever unsure, it's better to stop and ask for help than to risk a shock or a fire.
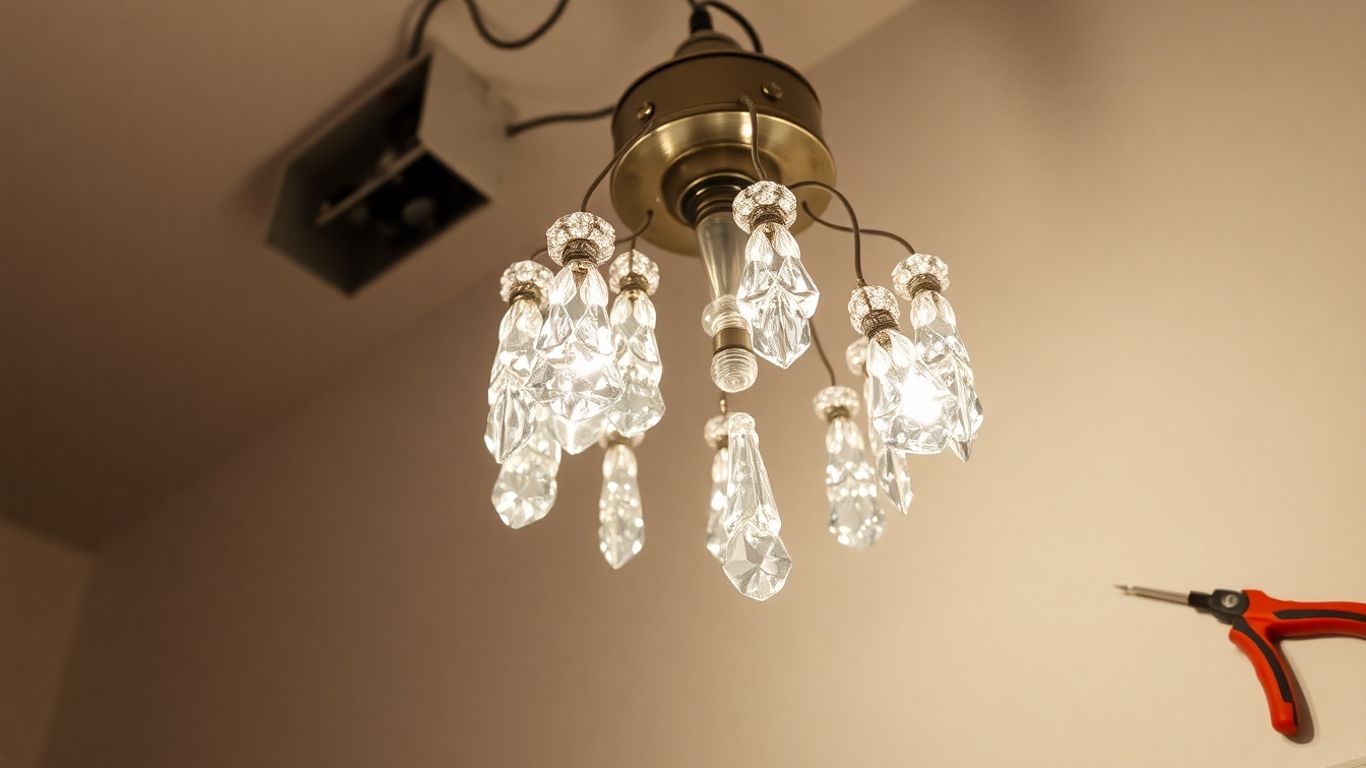
Step-by-Step Chandelier Wiring Process
Alright, let's get this chandelier wired up! It might seem a bit daunting, but if you take it one step at a time, you'll be admiring your new light fixture in no time. Remember to always turn off the power at the breaker box before you start touching any wires – safety first, always.
Preparing the Mounting Bracket
First things first, you need to get that mounting bracket ready. This is what will hold your chandelier securely to the ceiling. Most chandeliers come with one, and it usually attaches to the electrical box already in your ceiling. You might need to adjust it or secure it with screws. Make sure it's firmly attached; you don't want any wobbling.
Threading Wires Through the Fixture Chain
Now, for the chain. Chandeliers often have a decorative chain that also serves to hide the wiring. You'll need to carefully feed the wires from the chandelier up through the links of the chain. This can be a bit fiddly, so take your time. Sometimes, it helps to have a helper to guide the wires or hold the chain steady. You'll want to leave a little extra wire at both ends – one end to connect to the ceiling wiring, and the other to connect to the chandelier's internal wiring.
Connecting Wires to the Ceiling Box
This is where things get serious. Inside your ceiling electrical box, you'll find wires coming from your house's power supply. Typically, you'll see a black wire (hot), a white wire (neutral), and a bare copper or green wire (ground). Your chandelier will have corresponding wires. You'll use wire nuts to connect them:
- Black to Black: Connect the hot wire from the chandelier to the hot wire from the ceiling.
- White to White: Connect the neutral wire from the chandelier to the neutral wire from the ceiling.
- Ground to Ground: Connect the ground wire from the chandelier to the ground wire from the ceiling.
It's super important to make sure these connections are secure. A loose connection can cause flickering lights or even be a fire hazard.
Securing the Chandelier Fixture
Once all the wires are connected and tucked neatly into the ceiling box, it's time to hang the chandelier itself. This usually involves attaching the chandelier's canopy (the decorative cover that hides the wiring and mounting bracket) to the mounting bracket. There are often screws or a threaded rod that hold it in place. Make sure it's snug against the ceiling. Then, you can install your light bulbs, turn the power back on at the breaker, and test it out!
If at any point you feel unsure or uncomfortable, especially with the electrical connections, it's always best to stop and call a qualified electrician. They have the tools and knowledge to do it safely and correctly.
Common Chandelier Wiring Challenges and Solutions
Wiring up a fancy chandelier can sometimes feel like you're trying to untangle a bowl of spaghetti, right? Don't worry, most of us run into a few snags. The good news is, many common issues are totally fixable if you know what to look for.
Troubleshooting Flickering or Non-Functional Lights
This is probably the most common complaint. Lights flickering or not coming on at all can be super annoying. Often, the culprit is a loose connection somewhere in the system. It could be where the wires connect at the ceiling box, or even inside the chandelier itself where the wires meet the sockets.
- Loose Connections: Check all wire nuts and connections. Give them a gentle tug to make sure they're secure. If a wire nut feels loose, unscrew it, twist the wires together again firmly, and screw the nut back on tightly.
- Faulty Sockets: If one or two bulbs aren't working but others are, the socket itself might be the problem. Sometimes the little metal tab inside the socket that touches the bulb base can get bent or corroded. You can try gently prying it up a bit with a small screwdriver, but be careful not to break it.
- Bulb Issues: It sounds simple, but make sure you're using the correct wattage bulbs. Overloading a socket can cause problems, and sometimes a bulb is just dead.
Addressing Loose Connections and Damaged Wires
This is where you really need to be careful. Damaged wires are a safety hazard, plain and simple. You'll want to inspect the wiring carefully, looking for any nicks, cuts, or areas where the insulation has worn away.
| Problem Area | Potential Cause | What to Do |
|---|---|---|
| Exposed Wires | Insulation wear or damage | Immediately turn off power. Cover exposed wires with electrical tape. |
| Loose Wire Nuts | Improper tightening | Re-tighten or replace wire nuts, ensuring a secure connection. |
| Frayed Wires | Physical stress or age | Trim away damaged section and re-strip wire for a fresh connection. |
Always, always, always turn off the power at the circuit breaker before you touch any wires. Seriously, don't skip this step. It's not worth the risk of a shock. Use a voltage tester to double-check that the power is indeed off before you start poking around.
Resolving Power Supply and Socket Issues
Sometimes the problem isn't with the chandelier's wiring itself, but with the power coming to it. This can be trickier to diagnose.
- Check the Breaker: Did a breaker trip? Sometimes a power surge can cause this. Resetting the breaker might solve the issue.
- Dimmer Switch Problems: If your chandelier is on a dimmer switch, the switch itself could be faulty. Try bypassing the dimmer temporarily (if you're comfortable doing so and the power is off!) to see if the chandelier works directly. If it does, the dimmer needs replacing.
- Socket Wear: As mentioned before, sockets can wear out. If you've tried new bulbs and checked connections, and a specific socket still isn't working, it likely needs to be replaced. This involves carefully disconnecting the old socket and wiring in a new one.
Ensuring Safety During Chandelier Wiring
Working with electricity can be a bit nerve-wracking, and when it comes to something as prominent as a chandelier, you want to make sure it's done right and, most importantly, safely. Nobody wants a flickering light show or, worse, a real fire hazard because of a wiring mishap. Let's go over some key safety points to keep in mind.
Importance of Turning Off Power
This is the absolute first step, and it's non-negotiable. Before you even think about touching a wire, you need to cut the power to the area you're working in. This means heading to your home's circuit breaker panel and flipping the switch for the relevant circuit. Always double-check that the power is off by trying to flip the light switch for the chandelier; it shouldn't turn on. This simple step prevents any risk of electric shock, which can be seriously dangerous.
Using Insulated Tools and Protective Gear
Even with the power off, it's good practice to use tools designed for electrical work. These usually have insulated handles, offering an extra layer of protection. Think screwdrivers, wire strippers, and pliers. You might also want to wear safety glasses to protect your eyes from any stray bits of wire or dust. If you're working on a ladder, make sure it's stable and placed on a level surface. A wobbly ladder is just asking for trouble.
Recognizing Fire Hazards in Wiring
Sometimes, wiring issues can lead to fires. You'll want to keep an eye out for a few things. Check the insulation on the wires; if it looks cracked, frayed, or brittle, it's a sign of wear and needs attention. Loose connections are another big one – they can overheat and spark. If you notice any discoloration on the wires or around the connection points, that's also a red flag. Using the correct wire nuts and making sure connections are snug can help prevent these issues. If you ever smell burning plastic or see sparks, turn off the power immediately and call a professional.
It's easy to get caught up in the excitement of installing a new light fixture, but safety should always be the top priority. Taking a few extra minutes to ensure the power is off and using the right tools can save you a lot of trouble down the line. Don't rush the process; a little patience goes a long way when dealing with electrical work.
When to Seek Professional Chandelier Wiring Help

Look, sometimes you get into a wiring project, and it just feels… bigger than you thought. Maybe you've tried a few things, and the lights are still acting weird, or perhaps you're just not feeling confident about what you're seeing. That's totally okay. It's not about being bad at DIY; it's about knowing when to call in someone who does this every single day.
Identifying Complex Wiring Problems
If you're staring at a mess of wires and have no clue where to start, or if you've already found a few issues but aren't sure how to fix them safely, it's probably time to step back. Things like multiple loose connections, wires that look frayed or damaged, or a situation where the power seems to be cutting in and out unpredictably can be tricky. It's not just about getting the light to turn on; it's about making sure it's safe and won't cause problems down the road.
Here are some signs that might mean it's time to call a pro:
- Flickering or dimming lights that don't stop after checking the bulbs.
- Visible damage to wires, like nicks, cuts, or melted insulation.
- A burning smell coming from the fixture or the ceiling.
- The circuit breaker trips frequently when the chandelier is on.
- You're unsure about the wiring colors or how they should connect.
Working with electricity can be dangerous if you don't know exactly what you're doing. Even small mistakes can lead to shocks, fires, or damage to your home's electrical system. It's always better to be safe than sorry when it comes to wiring.
Advantages of Expert Diagnosis and Repair
Electricians have tools and knowledge that most of us don't. They can quickly figure out what's wrong, often with specialized testers, and they know the safest way to fix it. Plus, they're insured, so if something unexpected happens, there's a layer of protection. Getting it done right the first time by a professional can save you a lot of headaches and potential costs later on.
Routine Maintenance for Longevity
Even if your chandelier is working perfectly, a little check-up now and then can be a good idea. Think of it like getting an oil change for your car. A professional can spot potential issues before they become big problems. They can tighten connections, check for wear and tear on the wires, and make sure everything is up to code. This kind of preventative care helps your beautiful light fixture last for years and keeps your home safe.
Wrapping Up Your Chandelier Project
So, you've tackled the wiring, and hopefully, your new chandelier is shining bright. Remember, safety first was the main theme here, and if you ever felt unsure, calling in a pro was always the smart move. Keeping those connections tight and checking for wear now and then can save you a lot of hassle down the road. It's pretty cool how a well-wired light fixture can really change a room's feel. Enjoy your beautifully lit space!
Frequently Asked Questions
What are the main parts of a chandelier's wiring?
A chandelier's wiring usually has a main power line, wires that spread out to each light, and sockets for each bulb. It all connects to the main power through a box in the ceiling.
What do the different wire colors mean?
Typically, you'll see black for the 'hot' wire that carries power, white for the 'neutral' wire that completes the circuit, and green or bare copper for the 'ground' wire that provides safety.
What tools do I need to wire a chandelier?
You'll need basic tools like a screwdriver and wire strippers. A voltage tester is super important to make sure the power is off before you start. Safety glasses and gloves are also a must!
What should I do if the chandelier lights flicker?
Flickering lights often mean a loose connection somewhere. First, turn off the power! Then, check all the wire connections, especially where they meet the ceiling box and within the chandelier itself. Make sure they are secure.
Is it safe to wire a chandelier myself?
If you're comfortable with basic electrical work and follow all the safety steps, like turning off the power at the breaker, it can be a DIY project. But if you're unsure or the wiring looks complicated, it's always best to call a professional electrician.
How often should I check my chandelier wiring?
It's a good idea to give your chandelier's wiring a quick look every year or so. Just make sure nothing looks loose, worn out, or damaged. This helps prevent bigger problems down the road.


