Adding a chandelier to your bedroom can completely change the vibe of the space. It's not just about light; it's about style and ambiance. Whether you're a DIY enthusiast or just looking to brighten up your room, this guide will help you understand the ins and outs of chandelier wiring and installation. From selecting the right fixture to maintaining it, we've got you covered. Let’s get started!
Key Takeaways
- Choose a chandelier that fits the room size and style.
- Ensure proper support and wiring before installation.
- Consider hiring a professional for safe installation.
- Use dimmable bulbs for adjustable lighting moods.
- Regularly clean and check the chandelier for safety.
Selecting The Perfect Chandelier

Selecting a chandelier for your bedroom isn't just about adding light; it's about creating a vibe. It's about turning your bedroom into a luxurious space that shows off your style. A chandelier can be a total showstopper, adding elegance and warmth. Let's get into how to pick the perfect one.
Assessing Room Size And Ceiling Height
First things first, think about the size of your room and how high your ceiling is. You don't want a chandelier that's too big and overwhelms the space, or one that's too small and gets lost. A good rule of thumb is to match the chandelier's width in inches to the room's length in feet. So, if your room is 10x12 feet, aim for a chandelier around 22 inches wide. If you've got high ceilings, you can go for something taller or with multiple tiers to really fill the space.
Marrying Style With Decor
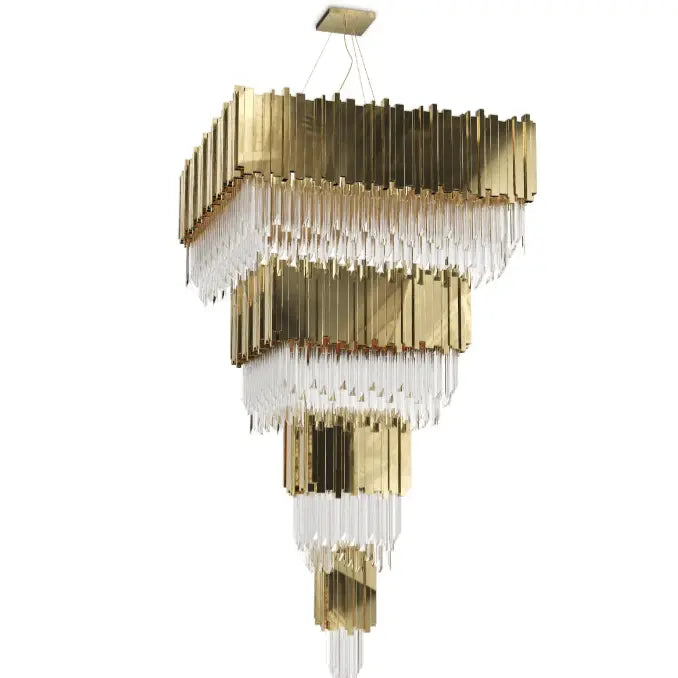
Your chandelier should totally vibe with your bedroom's style and colors. If your room is all soft colors and fabrics, a chandelier with frosted glass and a gentle metallic finish could be perfect. On the other hand, if you've got bold colors and modern furniture, maybe go for a sleek, minimalist design. Imagine how a rustic chandelier could warm up a country-chic bedroom, or how a crystal chandelier could add luxury to a traditional space.
Addressing Lighting Needs
One thing people often struggle with is getting the right amount of light. You don't want it too harsh or too dim. Look for chandeliers that work with dimmable bulbs. That way, you can adjust the brightness depending on what you're doing, whether it's relaxing before bed or getting ready in the morning. Think about where the chandelier will be in relation to other lights, like bedside lamps or natural light, to get a good balance.
It's important to consider the overall lighting scheme of your bedroom. A chandelier shouldn't be the only source of light. Layering different types of lighting, such as ambient, task, and accent lighting, will create a more functional and inviting space.
Installation Process
Planning And Preparation
Okay, so you've picked out your dream chandelier. Awesome! Now comes the part where you actually get it up on the ceiling. Don't just jump in! Planning is key. First, figure out where the wires are. You don't want to drill into something important. Check for pipes too. Seriously, it's worth the extra time to be sure. Make sure you have all the tools you need. Nothing is worse than getting halfway through and realizing you're missing something. I always lay everything out so I can see it all. It helps me keep track of what's going on. And for goodness' sake, turn off the power! I know it sounds obvious, but you'd be surprised.
- Check the ceiling's weight capacity.
- Gather all necessary tools and hardware.
- Read the chandelier's instructions carefully.
Before you even think about touching a wire, make absolutely sure the power is off at the breaker. Test it with a non-contact voltage tester. Trust me, it's not worth the risk.
Hiring A Professional
Sometimes, you just have to admit defeat. Or, maybe you just don't want to deal with it. That's where a professional comes in. It's okay to hire an electrician. Really! They know what they're doing. Plus, they can make sure everything is up to code. I know it costs money, but it might be worth it for the peace of mind. Ask around for recommendations. Check online reviews. Make sure they're licensed and insured. Get a quote before they start working. That way, there are no surprises. And don't be afraid to ask questions. They should be able to explain everything clearly.
Overcoming Installation Hurdles
So, you're doing it yourself? Great! But things don't always go smoothly. Maybe the wiring is weird. Maybe the ceiling box isn't strong enough. Maybe the chandelier is heavier than you thought. Don't panic! There are solutions. For weird wiring, take pictures and label everything before you disconnect anything. A residential lighting installation guide can be a lifesaver. If the ceiling box is weak, you might need to replace it with a stronger one. For a heavy chandelier, make sure you have the right support. You might need to add extra bracing in the attic. And if you get stuck, don't be afraid to call a professional. It's better to ask for help than to mess something up.
| Hurdle | Solution |
|---|---|
| Weak Ceiling Box | Replace with a stronger box |
| Heavy Chandelier | Add extra bracing in the attic |
| Unexpected Wiring Issues | Consult a professional electrician |
Styling Your Bedroom With A Chandelier
Coordinating With Bedroom Decor
Your chandelier should really feel like it belongs in the room. Think about how its style and color work with everything else, like your furniture, the fabrics you use, and even the art on the walls. It doesn't have to be a perfect match, but it should all coordinate its style to create a nice, put-together look.
Layering Bedroom Lighting
Don't rely only on the chandelier for all your light. It's a good idea to layer different types of lighting, such as table lamps, floor lamps, or even wall sconces. This way, you can use the chandelier for general lighting and other lights for reading or when you need more focused light.
Accessorizing For A Personal Touch
Make the space around your chandelier your own! You could add a decorative ceiling medallion for a classic touch, or hang the chandelier a bit off-center for a more relaxed feel. You can also play around with the light bulbs. Use clear bulbs for a brighter, sparkly effect, or go with frosted ones for a softer glow. These small changes can make a big difference in how the chandelier looks and feels in your room.
Think of your bedroom as a canvas. The chandelier is a key element, but it's the surrounding details that truly bring the space to life. Consider the overall mood you want to create and choose accessories that complement both the chandelier and your personal style. It's all about creating a space that feels uniquely yours.
Understanding Chandelier Wiring Basics
Types Of Wiring Systems
Okay, so when we talk about chandelier wiring, it's not just about twisting some wires together. You've got to understand the different systems out there. The most common one you'll run into is the standard 120V system, which is what most homes use for lighting. But, depending on where you live or the age of your house, you might encounter something different. Knowing what you're dealing with is half the battle. It's also important to understand the different voltage options available.
Safety Considerations
Safety is the absolute number one priority when you're messing with electricity. Seriously, don't skip this part. Always, always turn off the power at the breaker before you even think about touching any wires. Double-check it with a non-contact voltage tester. And if you're not comfortable working with electricity, call a professional. It's better to be safe than sorry. Also, make sure you're aware of electrical safety guidelines.
Tools Needed For Wiring
Alright, so you're ready to get your hands dirty? Here's a list of tools you'll probably need:
- Wire strippers: For removing the insulation without damaging the wire.
- Wire connectors (like wire nuts): To safely join wires together.
- Electrical tape: For extra insulation and securing connections.
- Screwdrivers: Both flathead and Phillips head, in various sizes.
- Pliers: For gripping and bending wires.
- Voltage tester: To make sure the power is off (seriously, double-check!).
It's also a good idea to have a helper, especially if you're dealing with a heavy chandelier. An extra set of hands can make the job a lot easier and safer. Plus, it's always good to have someone around in case something goes wrong.
And remember, always consult the manufacturer's instructions for your specific chandelier. They might have specific requirements or recommendations for wiring.
Common Wiring Mistakes To Avoid
Underestimating Weight Support
One of the biggest mistakes people make is not properly accounting for the chandelier's weight. Drywall alone won't cut it. You absolutely need to secure the mounting bracket to a ceiling joist or use a proper support brace. I've seen too many chandeliers come crashing down because someone thought a few drywall screws would hold a heavy fixture. It's not worth the risk! Always check the chandelier's weight and ensure your support system can handle it, with a safety margin to spare.
Ignoring Local Codes
Electrical codes exist for a reason: safety. Don't assume you know better than the code. Every area has its own specific regulations regarding electrical work, and these can change.
Here's a few things to keep in mind:
- Permits: Some installations require a permit. Check with your local building department.
- Wiring Types: Make sure you're using the correct type of wiring for your area and the fixture.
- Inspections: After installation, an inspection might be required to ensure everything is up to code.
Ignoring these codes can lead to fines, insurance issues, and, most importantly, dangerous situations. It's always best to err on the side of caution and do your research or consult with a qualified electrician.
Neglecting Proper Grounding
Grounding is a critical safety feature that protects against electrical shock. It provides a path for stray electricity to safely return to the source, tripping a breaker and preventing harm. If you skip or botch the grounding, you're putting yourself and others at risk. Always connect the ground wire (usually green or bare copper) to the grounding screw in the electrical box and the fixture. If you're unsure how to do this, get help from a professional. It's not worth risking your safety to save a few bucks.
Maintaining Your Chandelier

Cleaning Techniques
Okay, so you've got this beautiful chandelier, right? But dust happens. And cobwebs? Ugh. The key is regular, gentle cleaning. I usually start by turning off the power – safety first! Then, I grab a microfiber duster and lightly go over the whole thing. For tougher spots, a slightly damp cloth works wonders. Just make sure it's not too wet, you don't want to mess with the electrical components. For crystal chandeliers, there are special cleaners you can spray on, but always test it in a small area first. I've seen some people use gloves to avoid fingerprints, which is a smart move.
Checking Electrical Connections
Every now and then, it's a good idea to check the electrical connections. I'm no electrician, but I can usually spot a loose wire or a wonky connection. If you're not comfortable doing this yourself, definitely call in a pro. Loose connections can be a fire hazard, so it's not something to mess around with. I usually just give everything a gentle wiggle (again, power OFF!) to see if anything feels loose. If it does, I tighten it up with a screwdriver. But if anything looks seriously wrong, I call someone who knows what they're doing. Better safe than sorry, right?
Replacing Bulbs Safely
Changing bulbs seems simple, but there's a right way and a wrong way to do it. First, make sure the chandelier is off and the bulbs are cool. I've burned myself more than once by being impatient! Then, check what type of bulb it takes. I keep a stash of replacements on hand so I'm not scrambling when one burns out. When you're screwing in the new bulb, don't overtighten it. Just snug is good enough. And if you're using halogen bulbs, avoid touching them with your bare hands – the oils from your skin can shorten their lifespan. I usually use a cloth or gloves for those. Here's a quick guide:
- Turn off the power.
- Let the bulb cool down.
- Use the correct replacement bulb.
- Don't overtighten.
I remember one time, I was changing a bulb in my dining room chandelier and the whole thing started swaying. Turns out, the mounting bracket was loose! I had to get it fixed right away. So, while you're up there changing bulbs, give the whole fixture a once-over to make sure everything is secure.
Enhancing Ambiance With Dimming Options
Choosing Dimmable Fixtures
Okay, so you want to dim your chandelier, right? First, you gotta make sure the chandelier itself is actually dimmable. Not all of them are! Look for chandeliers that say they're compatible with dimmer switches. LED chandeliers are super popular now, but you need to get the ones that are specifically marked as dimmable LEDs. Regular LEDs often just flicker or buzz when you try to dim them, and nobody wants that. Also, check the chandelier's compatibility with different dimmer types. Some dimmers work better with certain types of bulbs, like LEDs or incandescents.
Installing Dimmer Switches
Alright, time to swap out that old on/off switch for a dimmer. First things first: turn off the power at the breaker! Seriously, don't skip this step. Once the power is off, take off the old switch and disconnect the wires. Now, connect the wires to the new dimmer switch. Usually, it's pretty straightforward – black wire to black wire, white to white, and maybe a ground wire. But always double-check the instructions that come with the dimmer switch. Once everything's wired up, screw the dimmer into the wall and put the cover plate back on. Flip the breaker back on and test it out. If it doesn't work, turn the breaker off again and double-check your wiring. You might want to consider smart home integration for your dimmer switches.
Creating Mood Lighting
Now for the fun part: setting the mood! Dimmers are awesome because you can adjust the brightness to fit whatever you're doing. Having a dinner party? Dim the lights for a cozy vibe. Watching a movie? Dim them even more for that theater feel. Reading a book? Turn them up a bit so you can see clearly. You can also play around with different types of bulbs to get different effects. Warmer bulbs (like 2700K) give off a soft, cozy glow, while cooler bulbs (like 5000K) are brighter and more energizing. Layering your lighting is also a great idea. Think about adding some lamps or accent lighting to complement your chandelier and create a more balanced and interesting look.
I recently installed a dimmer switch for my dining room chandelier, and it's been a game-changer. Before, it was either full-on bright or completely off, which wasn't great for setting the right atmosphere. Now, I can easily adjust the lighting to create the perfect mood for any occasion. It's amazing how much of a difference it makes!
Here's a simple table to help you choose the right color temperature for different moods:
| Mood | Color Temperature (Kelvin) | Description |
|---|---|---|
| Relaxing | 2700K - 3000K | Warm, cozy, inviting |
| Entertaining | 3000K - 4000K | Bright, cheerful, social |
| Focused | 4000K - 5000K | Clear, energizing, productive |
| Task Lighting | 5000K - 6500K | Very bright, ideal for detailed work |
Final Thoughts on Your Chandelier Journey
So, there you have it! Installing a chandelier in your bedroom can really change the vibe of the space. It’s not just about light; it’s about style and making the room feel like home. Sure, there might be some bumps along the way, like figuring out the right height or dealing with tricky wiring. But with a bit of patience and the right tools, you can totally pull it off. Just remember to pick a chandelier that fits your style and the room's size. And if things get too complicated, don’t hesitate to call in a pro. In the end, your bedroom should be a cozy retreat that reflects who you are. Happy decorating!
Frequently Asked Questions
How do I pick the right chandelier for my bedroom?
To choose the right chandelier, first measure your bedroom to make sure the size fits well. A good rule is that for every foot of ceiling height, the chandelier should be 2-3 inches tall. Think about the style you like and how bright you want the light to be.
What should I consider before installing a chandelier?
Before hanging a chandelier, check if the ceiling can hold its weight. You might need to reinforce the electrical box or hire an electrician to help with the installation.
Can I install a chandelier myself?
Yes, you can install a chandelier yourself if you feel comfortable with basic electrical work. However, hiring a professional is safer, especially for heavy fixtures.
How do I clean my chandelier?
To clean your chandelier, turn off the power and gently dust it with a soft cloth. For deeper cleaning, use a damp cloth and a mild soap solution, but avoid soaking any electrical parts.
What are some common mistakes when wiring a chandelier?
Common mistakes include not checking if the ceiling can support the weight, ignoring local electrical codes, and forgetting to properly ground the fixture.
How can I create a cozy atmosphere with my chandelier?
To create a cozy feel, choose a dimmable chandelier and pair it with soft lighting. Consider using warm bulbs and layering your lighting with lamps or sconces.


