
Want to give your home a fresh look without spending a ton of money? Updating a chandelier can totally change a room's vibe. It's a fun project, and you get to make something truly unique. This article will walk you through everything, from picking the right light fixture to adding your personal touch. Let's get started on making your old chandelier shine!
Key Takeaways
- Picking the right chandelier size and style sets up a good makeover.
- Always take your chandelier apart and clean it well before you start any work.
- Get creative with paint to give your chandelier a fresh, new look.
- Add things like crystals, beads, or fabric to make your chandelier special.
- Think about using old chandeliers outdoors by making them weather-resistant.
Choosing the Perfect Chandelier for Your Makeover
Picking the right chandelier is the first big step in any makeover. It's not just about finding something pretty; it's about finding something that fits your space and style. Think of it as the jewelry of your room – it can really pull everything together.
Proportion Matters for Updating a Chandelier
Size is super important. You don't want a tiny chandelier in a huge room, or a massive one in a small space. It'll look weird. A good rule of thumb is to measure the length and width of your room in feet, add those numbers together, and that's the diameter of the chandelier in inches that would work well. For example, a 10-foot by 12-foot room would need a chandelier around 22 inches in diameter. It's not an exact science, but it's a good starting point. Also, consider the room's size and style when choosing a chandelier.
Height Considerations for Updating a Chandelier
How high your ceiling is makes a big difference. You need to make sure people aren't bumping their heads on it! For dining rooms, the bottom of the chandelier should be about 30-34 inches above the table. In open areas, aim for about 7 feet from the floor. If you have really high ceilings, you can go higher, but those are good baselines. If you're hanging it in a hallway, make sure there's enough clearance so people can walk under it comfortably.
Style Coordination for Updating a Chandelier
Think about the overall vibe of your room. Is it modern? Rustic? Traditional? You want the chandelier to complement that, not clash with it. A super modern, geometric chandelier might look out of place in a cozy, farmhouse-style dining room. On the other hand, a crystal chandelier might be perfect for a glam, contemporary space. Look at the existing colors, furniture, and decor, and try to find a chandelier that fits in with that aesthetic.
Don't be afraid to mix styles a little bit, but make sure there's some kind of connection. Maybe the chandelier has a similar metal finish to your furniture, or it incorporates a color that's already in the room. It's all about creating a cohesive look that feels intentional, not random.
Preparing Your Chandelier for a Makeover
Disassembling the Fixture Safely
Okay, so you're ready to get started on your chandelier transformation! First things first: safety. You absolutely must turn off the power at the breaker before you even think about touching the fixture safely. Seriously, don't skip this step. Once the power is off, carefully take the chandelier down. I like to put down a soft blanket or something to protect it (and my floor!).
- Take pictures as you disassemble. Trust me, you'll thank yourself later when you're trying to put it back together.
- Keep all the screws and small parts in labeled bags or containers. Nothing is more annoying than losing a tiny screw halfway through a project.
- If some parts are stuck, don't force them. A little bit of WD-40 can work wonders.
Cleaning and Priming for a Flawless Finish
Once your chandelier is in pieces, it's time to get it clean. Dust, grime, and old paint can prevent your new finish from adhering properly. I usually start with a soft cloth and some mild soap and water. For tougher spots, a little bit of vinegar can do the trick. Make sure everything is completely dry before you move on to priming. Priming is key for a lasting finish, especially if you're painting metal or a glossy surface. Use a good quality primer that's designed for the material of your chandelier.
Gathering Your Tools and Materials
Before you start painting or adding decorative elements, make sure you have everything you need. Running to the store in the middle of a project is a buzzkill. Here's a basic checklist:
- Screwdrivers (various sizes)
- Pliers
- Cleaning supplies (soap, water, vinegar, cloths)
- Sandpaper (if needed)
- Primer
- Paint (spray paint or brush-on, depending on your preference)
- Paintbrushes (if using brush-on paint)
- Drop cloths or newspaper to protect your work surface
- Safety glasses and a mask (especially if you're spray painting)
Taking the time to prep your chandelier properly is honestly half the battle. A clean, primed surface will make your paint job look so much better and last way longer. Plus, having all your tools and materials ready to go will make the whole process smoother and less stressful.
Creative Painting Techniques for Chandeliers
Using Spray Paint for a Smooth Finish
Spray paint is a super way to give your chandelier a fresh, new look. It can give you a really smooth and even finish, which makes any old fixture look brand new. Before you start, make sure you take the whole thing apart and clean every surface. This helps the paint stick better and last longer. Don't forget to work where there's good air flow, and using a primer first will give you the best results. If you are having trouble with the paint sticking, consider using a specialized primer.
Incorporating Metallic and Matte Paints
Mixing metallic and matte paints can make your chandelier look way more interesting and add some depth. Metallic paints can make it feel fancy, while matte paints are more subtle and modern. You can even use both together for something unique. For example, you could paint the main part of the chandelier in a matte color and then use metallic paint for the smaller details. It's all about playing around and seeing what looks cool to you.
Creating Ombre and Gradient Effects
Ombre and gradient effects are a fun way to add some color to your chandelier. Start with a light color at the top and then slowly change to a darker color at the bottom. You can do this with spray paint or regular paint and a brush. It takes a little more time, but the end result is a really cool, eye-catching piece. It's like giving your chandelier a total makeover! You can also try using different paint brushes to achieve different textures.
Painting your chandelier is a fun project. It lets you try out different styles and make your space your own. It's a great way to show off your personality and make your home feel more like you.
Adding Decorative Elements to Your Chandelier
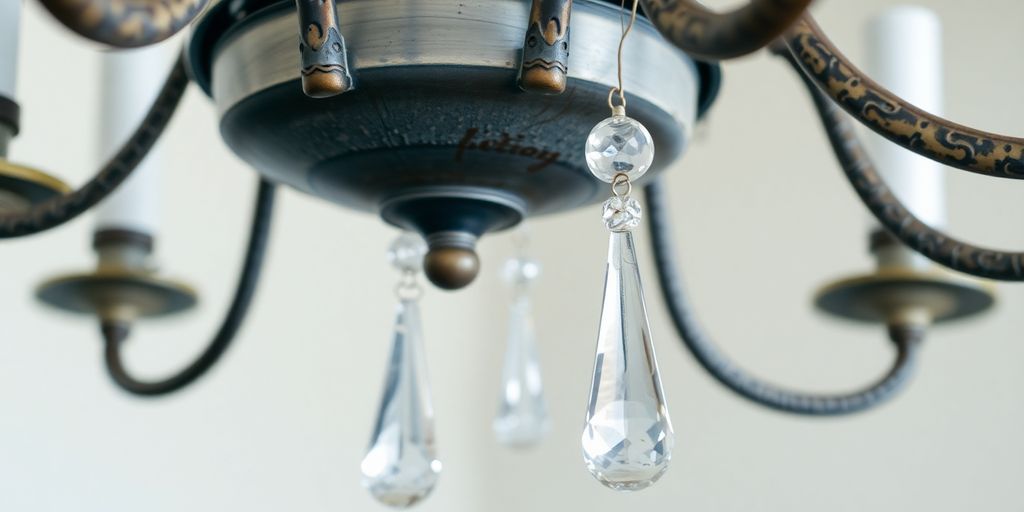
Incorporating Crystals and Beads
Adding crystals and beads is a super easy way to jazz up a plain chandelier. You can find budget-friendly options at most craft stores, so it doesn't have to break the bank. I usually just thread the beads onto some thin wire and then wrap them around the arms of the chandelier. It's a simple touch that can really transform the whole look. It can turn a plain chandelier into a dazzling centerpiece.
Using Twine and Fabric Wraps
If you're going for more of a rustic or bohemian vibe, twine and fabric wraps are the way to go. I love wrapping twine around the arms of an old chandelier and securing it with a bit of hot glue. You can also use strips of fabric to add a pop of color or pattern. It's a pretty simple method, but it adds a unique touch. I did this for my guest bedroom, and it looks amazing!
Attaching Vintage and Thrifted Finds
Repurposing vintage and thrifted items is a fun way to give your chandelier a unique and eclectic look. I've seen people attach old keys, small picture frames, or even vintage jewelry to their chandeliers. It not only adds character but also makes your chandelier a real conversation piece. I found some cool old buttons at a flea market last month, and I'm planning to use them for my next chandelier project. It's all about finding those little treasures that speak to you.
Adding decorative elements to your chandelier is a fun and creative way to personalize your space. Whether you choose crystals, twine, or vintage finds, your chandelier will become a unique reflection of your style.
Repurposing Chandeliers for Outdoor Spaces
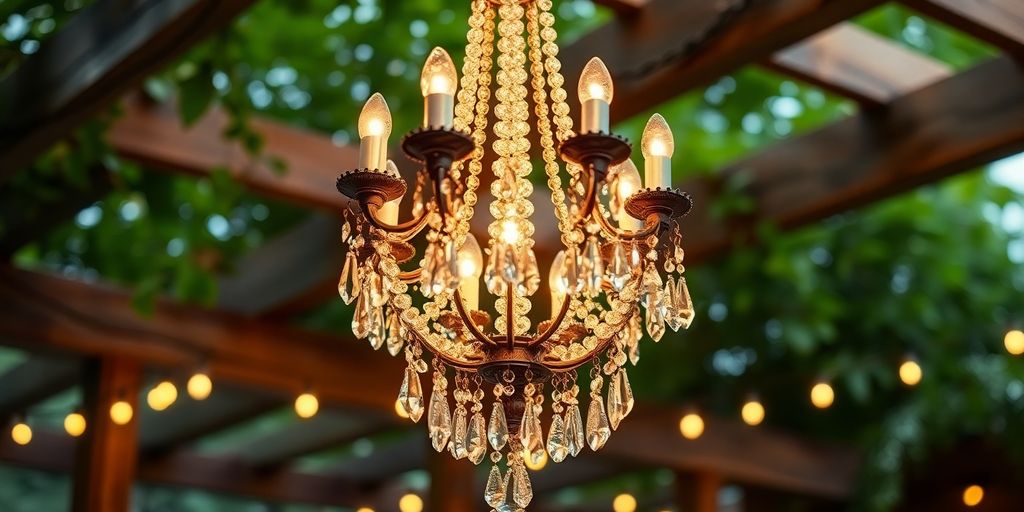
Who says chandeliers are only for indoors? I've been seeing some amazing transformations lately, turning old chandeliers into stunning outdoor features. It's a great way to add some unexpected elegance to your garden or patio. Plus, it's a fantastic way to repurpose that thrift store find instead of letting it gather dust.
Transforming an Old Chandelier into a Solar Light
Okay, this is probably my favorite idea. Imagine taking an old, unwanted chandelier and turning it into a beautiful solar-powered light for your garden. It's not as hard as it sounds! You basically remove the old wiring and replace it with solar lights. You can find solar light kits online or at most hardware stores. It's eco-friendly and adds a magical touch to your outdoor space. Plus, you don't have to worry about running electrical wires!
Selecting Weather-Resistant Materials
This is super important. If you're putting a chandelier outside, you need to make sure it can handle the elements. That means using weather-resistant materials. Look for things like rust-resistant metals or treated wood. You might also want to consider using outdoor-rated paints and sealants to protect the finish. Nobody wants a rusty, peeling chandelier after just a few months. Here's a quick guide:
| Material | Weather Resistance | Notes |
|---|---|---|
| Aluminum | High | Lightweight, doesn't rust |
| Stainless Steel | High | Durable, but can be more expensive |
| Treated Wood | Medium | Needs regular sealing to prevent rot |
| Outdoor-Rated Paint | Medium | Protects against UV and moisture |
Designing for Durability and Style
So, you want your outdoor chandelier to look good, but you also want it to last. Think about how you can combine style and durability. Maybe use heavier chains to hang it, so it doesn't sway too much in the wind. Or add some extra supports to the frame. And don't forget about the overall design! Does it fit with your garden's aesthetic? Does it complement your patio furniture? A little planning can go a long way.
I think the best part about repurposing chandeliers for outdoor spaces is that you can really let your creativity shine. There are no rules! Just have fun and create something that you love. It's a great way to add a personal touch to your outdoor decor and make your space feel extra special.
Lighting and Electrical Considerations for Updating a Chandelier
Choosing the Right Bulbs for Ambiance
Okay, so you've got this awesome chandelier, right? But the bulbs can totally make or break the vibe. Think about what kind of mood you're going for. Are you after something cozy and warm, or bright and energizing? Different bulbs give off different colors, measured in Kelvins. Lower numbers (like 2700K) are warmer, while higher numbers (like 5000K) are cooler. Also, consider the bulb type. LEDs are super energy-efficient and last forever, but some people still like the look of incandescent bulbs. It's all about personal preference!
Ensuring Electrical Safety
Seriously, don't mess around with electricity if you're not comfortable. It's not worth the risk. Before you even think about touching your chandelier, flip the breaker. Double-check it's off with a non-contact voltage tester. When you're wiring things up, make sure all the connections are solid and use the right wire connectors. If you're at all unsure, call a qualified electrician. It's better to be safe than sorry. I know it sounds obvious, but people get hurt all the time doing simple electrical work.
Installing Dimmer Switches for Versatility
Want to take your chandelier to the next level? Get a dimmer switch! It lets you adjust the brightness depending on the situation. Movie night? Dim it down low. Having a party? Crank it up! Make sure the dimmer switch is compatible with the type of bulbs you're using. LEDs often need special dimmers. Installation is usually pretty straightforward, but again, if you're not comfortable with electrical work, get a pro to do it. A dimmer switch really adds a lot of flexibility.
Showcasing Your DIY Chandelier
Styling Tips for Different Rooms
Okay, so you've poured your heart and soul into this chandelier project, right? Now it's time to actually show it off! Think about where it's going. Is it a chill bedroom, a fancy dining room, or a modern living space? The key is to make sure the chandelier fits the vibe. A well-placed chandelier can really become the focal point, so don't be afraid to let it shine.
- Match the chandelier's style with other decor elements.
- Consider the room's color scheme.
- Think about the overall theme of the room.
I remember when I put a super modern chandelier in my grandma's super traditional dining room. It was... a choice. Let's just say it didn't exactly scream "cohesive." Learn from my mistakes, people!
Photographing Your Finished Piece
You need to get some good photos of your masterpiece! Natural light is your best friend here. Try to take pictures from different angles to show off all the details. Get a close-up to highlight any cool crystals or beads you added. Good lighting is key to making your DIY chandelier look amazing.
Sharing Your Project on Social Media
Time to brag! Post some before-and-after pics on social media. Write a little about your process – what was easy, what was hard, what you learned. Engage with other DIYers online. You might even inspire someone else to try their hand at a clearance sale chandelier makeover!
Conclusion
So, giving your old chandelier a new look can be a really fun thing to do. With just a little bit of imagination and some basic stuff, you can totally change a plain light fixture into something amazing. Whether you decide to paint it, add some sparkly bits, or wrap it in string, there are so many ways to go. Not only will you save some cash by doing it yourself, but you'll also end up with a one-of-a-kind piece that really shows off your own style. So, grab your tools and get going on your chandelier project today!
Frequently Asked Questions
How do I pick the best chandelier for my space?
First, think about the room's size and how it looks. Make sure the light fixture fits with your home's style. Also, consider your budget and the chandelier's shape and size.
What should I do before painting my chandelier?
Before you start, carefully take the chandelier apart. Clean all the pieces well, and get all your tools and supplies ready. This helps the paint stick better and look nicer.
Can I use any kind of paint on my chandelier?
It's usually best to use spray paint for a smooth finish. You can also try metallic or matte paints. Just make sure the paint works with what your chandelier is made from.
How can I add decorations to my chandelier?
You can add shiny crystals and beads for a fancy look. If you want a more natural feel, wrap it with twine or fabric. You can also attach old or second-hand items to make it truly special.
Can I use a chandelier outside?
Yes, you can turn an old chandelier into a cool outdoor light, like one that uses solar power. Just make sure to pick materials that can handle different kinds of weather.
What should I know about the lights and electricity for my chandelier?
It's important to pick the right light bulbs to get the mood you want. Always make sure the wiring is safe. Adding dimmer switches lets you change how bright the light is for different times.


