Step by Step Vintage Chandelier Restoration Guide - The fun and rewarding project.
Restoring a can be a fun and rewarding project. Whether you've found an old chandelier at a flea market or inherited one from a family member, bringing it back to its former glory is a great way to add a touch of elegance to your home. This guide will walk you through every step, from gathering the necessary tools to the final installation.
Key Takeaways
- Gather all essential tools and materials before starting the restoration process.
- Carefully document each step during disassembly to ensure easy reassembly.
- Use appropriate cleaning techniques and materials to avoid damaging the chandelier.
- Pay close attention to rewiring to ensure the chandelier is safe to use.
- Regular maintenance can keep your restored chandelier looking beautiful for years.
Essential Tools and Materials for Vintage Chandelier Restoration
Restoring a vintage chandelier can be a rewarding project, but having the right tools and materials is crucial. Proper preparation ensures a smoother restoration process and better results. Below, we outline the essential items you'll need to get started.
Initial Assessment and Disassembly
Inspecting the Chandelier
Before starting, carefully inspect the chandelier for any damage or missing parts. Look for signs of wear, rust, or broken pieces. This step helps you understand what needs fixing and what parts you might need to replace.
Disassembling Components
Begin by taking apart the chandelier. Unscrew and remove each piece gently. Some decorative elements might be vacuum packed. In this case, cut along the outer edges of the package and carefully remove the transparent protective film. Arrange all the pieces on a large surface and check that they are intact. On your table, you should see the following chandelier parts:
- Central body
- Arms
- Decorative elements
- Wiring components
Documenting the Process
As you disassemble, take pictures or notes. This will help you remember how to put everything back together. For example, note how the top galvanized metal part screws onto the lower metal part. There are three screws that attach the lower metal part to the green enamel pendant. After taking everything apart, you might find that some parts, like the white porcelain fixture, are corroded and need replacement.
Taking photos along the way ensures you won't forget how to reassemble the chandelier later. This step is crucial for a successful restoration.
By following these steps, you can ensure a smooth restoration process and avoid any confusion when it's time to reassemble your vintage chandelier.
Cleaning and Prepping the Chandelier
Choosing the Right Cleaner
Selecting the proper cleaner is crucial for a successful restoration. Always use a cleaner that is safe for the materials of your chandelier. For vintage chandeliers, a gentle cleaner like Krud Kutter is often recommended. Make sure to place a drop cloth underneath to catch any drips and protect your workspace.
Cleaning Techniques
Cleaning is an important part of the preparation process! Especially if you have a vintage chandelier that has been collecting dust for a long time. Here are the steps to follow:
- Hang the chandelier securely using a strong piece of wire or pipe.
- Apply the cleaner to an old rag or microfiber cloth.
- Wipe down all parts of the chandelier, paying special attention to intricate areas.
- For crystal chandeliers, you can use a spray-on cleaner that drips and dries.
Proper cleaning ensures that your chandelier will look its best and be ready for the next steps in the restoration process.
Preparing for Painting
Before painting, it's essential to prep the chandelier properly. This includes cleaning it thoroughly and allowing it to dry completely. If you plan to use wax, apply a clear wax coat first. This step is really important because it helps to fix any mistakes if you mess up later. Work in sections to ensure even coverage. Once the chandelier is clean and prepped, you can move on to painting or other decorative finishes.
Repairing and Rewiring the Chandelier
Repairing and rewiring your vintage chandelier is a crucial step in bringing it back to life. Ensuring the structural integrity and electrical safety of your chandelier will make it both beautiful and functional.
Fixing Structural Issues
Start by examining the chandelier for any broken or damaged parts. Common issues include bent arms, loose connections, or missing pieces. Use a small wrench or pliers to tighten any loose screws and replace any broken components. If you find any bent arms, gently straighten them using your hands or a soft mallet.
Rewiring Steps
- Turn off the power to the chandelier at the circuit breaker to ensure safety.
- Remove the old wiring carefully, noting how it was connected. Take pictures if necessary to document the process.
- Cut new lamp wire into appropriate lengths and thread them through the arms of the chandelier. If threading is difficult, use a smaller wire to guide the lamp wire through.
- Attach the new lamp sockets by screwing them into place and connecting the wires as per your documentation.
- Cap off the wires and tape them securely to prevent any electrical hazards.
Testing Electrical Components
Before reassembling the chandelier, it's essential to test the electrical components. Connect the chandelier to a power source and turn it on to ensure all connections are secure and the lights work properly. If any issues arise, double-check your wiring and connections.
Taking the time to carefully repair and rewire your chandelier will ensure it not only looks stunning but also functions safely and efficiently.
Reassembling and Final Touches
Reassembling the Chandelier
Now that all parts are clean and repaired, it's time to put your chandelier back together. Start by reattaching the main body and then move on to the arms. Make sure each piece is securely fastened to avoid any accidents. If you have any decorative elements like flowers or leaves, insert them into the correct holes on the arm plate. It's normal to have a few spare parts left over.
Adding Crystals and Decorations
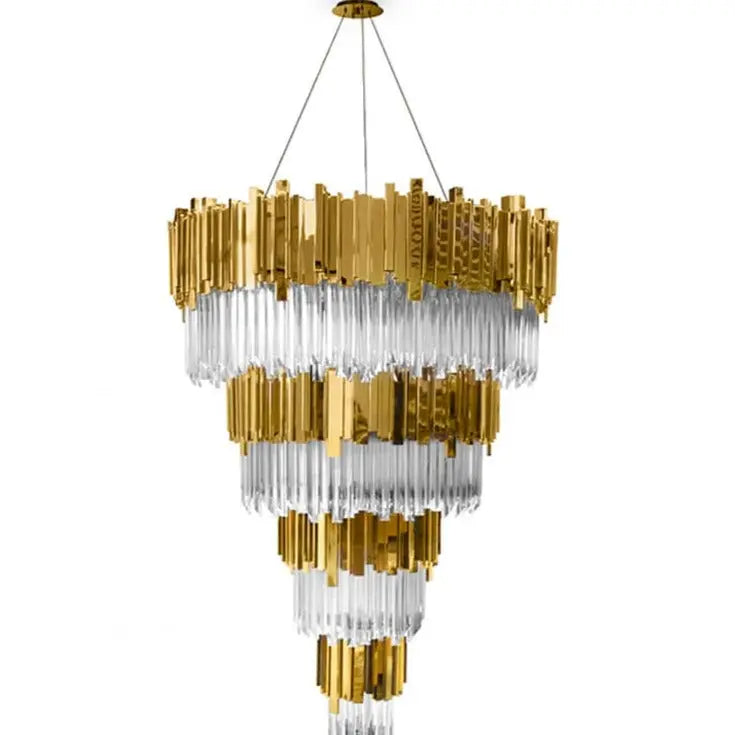
Once the main structure is assembled, you can start adding the crystals and other decorations. This is where your chandelier will really start to shine. Attach each crystal carefully, ensuring they are evenly spaced. If you have different types of decorations, like tall leaves or cups, make sure they are placed in their designated spots.
Final Inspection and Installation
Before you hang your chandelier, do a final inspection. Check that all parts are securely attached and that there are no loose wires. If everything looks good, you can proceed to install the chandelier in its designated spot. Remember to put the cardboard insulator back on to ensure safety. Once installed, flick the switch to see your diy chandelier makeover come to life.
Maintaining Your Restored Chandelier
To keep your restored chandelier looking its best, regular maintenance is key. Regular cleaning helps prevent dust buildup and keeps the fixture shining. Here are some tips to maintain your chandelier:
- Regular Cleaning Tips:
- Periodic Inspections:
- Handling Minor Repairs:
Keeping your chandelier well-maintained not only preserves its beauty but also ensures its longevity.
By following these simple steps, you can enjoy your vintage chandelier for many years to come. For more detailed guidance, check out the guide on restoring wrought iron chandeliers that emphasizes preservation and maintenance.
Keeping your chandelier looking its best is easier than you think! Regular dusting and occasional deep cleaning will keep it sparkling. For more tips and tricks on maintaining your chandelier, visit our website today!
Conclusion
Restoring a vintage chandelier can be a fun and rewarding project. By following the steps outlined in this guide, you can bring new life to an old fixture and add a touch of elegance to your home. Remember to take your time, be patient, and enjoy the process. Whether you're cleaning, rewiring, or adding new crystals, each step is important in achieving a beautiful end result. Happy restoring!
Frequently Asked Questions
What tools do I need to restore a vintage chandelier?
You'll need pliers, a sanding sponge, tack cloth, and possibly a spray cleaner. Depending on the condition, you might also need wire cutters and a multimeter for electrical testing.
Is it safe to rewire a chandelier myself?
Rewiring a chandelier can be safe if you follow the right steps and take precautions. Make sure to turn off the power and double-check your connections. If you're unsure, consult a professional.
How do I clean a vintage chandelier without damaging it?
Use a gentle cleaner and a soft cloth. Avoid harsh chemicals that might damage the finish. For delicate parts, a spray cleaner that drips and dries might be useful.
Can I repaint my chandelier?
Yes, you can repaint your chandelier. Make sure to clean and sand it first, then use a spray paint suitable for metal surfaces. Always follow the paint manufacturer's instructions.
What should I do if my chandelier has missing crystals?
You can buy replacement crystals online or at specialty stores. Make sure to match the size and shape to maintain the chandelier's original look.
How often should I clean my restored chandelier?
It's a good idea to clean your chandelier every few months to keep it looking its best. Regular dusting can help, and a more thorough cleaning can be done once or twice a year.


