If you're looking to spruce up your home and add a personal touch, why not try making your own DIY chandelier? These projects are not just fun but can also be a great way to express your style. From rustic to modern designs, there’s something for everyone. Let’s dive into some creative ideas that will brighten up your space and impress your guests!
Key Takeaways
- You can make chandeliers from many materials like jars, wood, and even bottles.
- Customize your chandelier to fit your home’s style and colors.
- Always prioritize safety when working with electrical components.
- Upcycling is a great way to save money and add unique flair to your decor.
- Feel free to experiment with different shapes and designs for a unique look.
Charming Mason Jar Chandeliers
Mason jar chandeliers? I know, it sounds a little out there, but trust me, they can look amazing! I've been seeing them pop up everywhere, and I finally decided to give it a shot. It's way simpler than you'd think, and the end result is this super charming, rustic vibe that I'm totally loving. Plus, you get to customize it to fit your space, which is always a win in my book. It's a great way to add some creative DIY home decor to your space.
Creating a Cozy Atmosphere
Okay, so the whole point of a mason jar chandelier is to make your space feel warm and inviting. Think about the kind of light you want. Do you want it bright and functional, or more of a soft, ambient glow? I went for the latter. Using warm-toned bulbs is key here. It instantly makes the room feel more relaxed. You can also play around with the placement of the jars to control how the light is distributed. I staggered mine a bit to create some interesting shadows.
- Use warm-toned bulbs for a cozy glow.
- Stagger jar placement for interesting shadows.
- Consider the overall brightness you want to achieve.
I found that dimmable bulbs were a game-changer. Being able to adjust the brightness depending on the mood is fantastic. Plus, it helps save energy!
Steps to Assemble Your Chandelier
Alright, let's get down to the nitty-gritty. Here's a basic rundown of how to put one of these bad boys together. First, you'll need a chandelier frame – you can find these at most hardware stores or even online. Then, you'll need your mason jars, some wire, and light sockets. Basically, you're wiring the sockets to the frame and then using the wire to hang the mason jars from the frame. Make sure everything is secure before you start adding bulbs! You can find a upcycled mason jar pendant light tutorial online if you need more help.
- Gather your materials: chandelier frame, mason jars, wire, light sockets.
- Wire the sockets to the frame.
- Hang the mason jars from the frame using wire.
Personalizing Your Design
This is where the fun really begins! You can totally customize your mason jar chandelier to fit your personal style. Want a more rustic look? Use twine or rope to hang the jars instead of wire. Want something a little more modern? Paint the jars a fun color or add some decorative elements like beads or crystals. The possibilities are endless! I even saw one where someone stuffed garden lighting into the jars, and it looked amazing!
| Personalization Option | Description |
|---|---|
| Jar Color | Paint the jars to match your decor. |
| Hanging Material | Use twine, rope, or wire for different aesthetics. |
| Decorative Elements | Add beads, crystals, or other embellishments for a unique touch. |
| Bulb Type | Experiment with different bulb shapes and colors for varying light effects. |
Upcycled Lighting Projects for Unique Decor
Ideas for Upcycled Lighting
Upcycling is seriously cool. It's like giving old stuff a new life, and when it comes to lighting, the possibilities are endless. I've seen some amazing things people have done, and it's way more fun than just buying something from a store. Plus, you get a one-of-a-kind piece that no one else has.
- Wine Bottle Lights: Clean out a wine bottle, pop in some LED string lights, and boom – instant mood lighting. I did this for my patio, and it looks amazing at night.
- Colander Pendants: Who knew a kitchen tool could become a light fixture? Turn an old colander into a rustic pendant light. It's surprisingly stylish.
- Ladder Lamp: I saw someone turn an old wooden ladder into a standing lamp. They just ran the wires along the sides and added bulbs. It looked so unique.
Upcycling isn't just about saving money; it's about being creative and reducing waste. It's a win-win. You get a cool light, and the planet gets a little break.
Materials You Can Use
Okay, so what can you actually upcycle? Pretty much anything! But here are some ideas to get you started:
- Glass Bottles: Wine, beer, even old soda bottles can become lamps or pendants.
- Metal Cans: Think paint cans, coffee cans – they can be turned into industrial-style lights.
- Old Lampshades: Give them a makeover with new fabric or paint.
- Wooden Pallets: Great for creating rustic wall sconces or even chandeliers.
Benefits of Upcycling
Why bother with upcycling when you can just buy something new? Well, here's the deal:
- It's Budget-Friendly: You're using stuff you already have or can get cheap.
- It's Eco-Friendly: You're reducing waste and giving new life to old items.
- It's Unique: Your lighting will be one-of-a-kind, reflecting your personal style.
Plus, it's just plain fun. There's something really satisfying about taking something old and turning it into something beautiful and useful. Give it a try – you might surprise yourself!
Stylish Drum Shade Chandeliers

Choosing the Right Shade
Okay, so you're thinking about a drum shade chandelier? Awesome! First things first, you gotta pick the right shade. Think about the size of your room. A huge shade in a tiny room? Not a good look. Too small of a shade in a big room? It'll get lost. Also, consider the color. Do you want something that pops, or something that blends in? Light colors make a room feel bigger, while dark colors can make it feel cozier. And don't forget the material! Fabric shades give off a softer light, while metal shades can be more modern. It's all about finding that sweet spot.
Step-by-Step Assembly
Alright, let's get down to business. Assembling a drum shade chandelier isn't rocket science, but you gotta pay attention. Here's the basic rundown:
- Start with the frame: Most kits come with a metal frame. Make sure it's sturdy and level.
- Attach the shade: This is where the drum shade comes in. Usually, it's held in place with rings or clips. Make sure it's snug!
- Wire it up: This is the tricky part. If you're not comfortable with electrical work, seriously, get a pro. Safety first!
- Hang it up: Find a good spot in your ceiling, and make sure it's properly supported. You don't want your chandelier crashing down in the middle of dinner.
Drum shade chandeliers are a great way to add a touch of elegance to any room. They're relatively easy to assemble, and they can really transform the look of your space. Just make sure you take your time and follow the instructions carefully.
Adding Decorative Touches
Now for the fun part! You've got your basic drum shade chandelier up, but it's a little plain, right? Let's spice it up! Here are some ideas:
- Fringe: Add some fringe around the bottom of the shade for a bohemian vibe.
- Ribbon: Wrap some ribbon around the shade for a pop of color. You can find a drum shade chandelier that matches your style.
- Beads: Glue some beads onto the shade for a touch of glam.
- Fabric: Cover the shade with a cool fabric. Think velvet, silk, or even burlap for a rustic look.
| Decoration | Style | Difficulty | Cost |
|---|---|---|---|
| Fringe | Bohemian | Easy | Low |
| Ribbon | Versatile | Easy | Low |
| Beads | Glam | Medium | Medium |
| Fabric | Customizable | Medium | Medium |
Elegant Wooden Bead Chandeliers

Materials Needed
Okay, so you want to make a wooden bead chandelier? Awesome! First, you'll need some stuff. Obviously, you'll need wooden beads. Think about the size and shape you want. Big chunky ones? Small delicate ones? A mix? It's all up to you. You'll also need a frame. A metal hoop works great, or even a sturdy wire wreath form. Then there's the string or wire to hang the beads. Fishing line is strong and clear, but wire can give it a more industrial look. Don't forget the light kit – you can get these at most hardware stores. And finally, some paint or stain if you want to change the color of the beads or frame.
- Wooden beads (various sizes and shapes)
- Metal hoop or wire wreath form
- String, wire, or fishing line
- Light kit (socket, wire, canopy)
- Paint or stain (optional)
Assembly Instructions
Alright, let's get building! First, if you're painting or staining anything, do that now and let it dry completely. Next, attach your string or wire to the frame. This is what you'll use to hang the beads. Now comes the fun part: stringing the beads! You can create patterns, alternate sizes, or just go totally random. Once all the beads are on, secure the ends of the string or wire to the frame. Finally, install the light kit according to the instructions. Make sure you turn off the power before you start messing with any wires!
Styling Tips for Your Space
So, you've got your beautiful new chandelier. Now what? Think about where you're going to hang it. Over a dining table? In a bedroom? The location will influence the kind of bulbs you use. For a dining area, you might want brighter light. In a bedroom, something softer and warmer. Also, consider the overall style of your room. Does your chandelier match? If you've got a boho chic home decor going on, maybe you want to keep the beads natural. If your room is more modern, you could paint the beads a metallic color. Don't be afraid to experiment!
A dimmer switch is a game-changer. It lets you adjust the brightness to create the perfect mood. Also, think about the length of the chain or cord. You want the chandelier to hang at the right height for your space. Too high, and it disappears. Too low, and people will bump their heads.
Creative Outdoor Chandeliers
Design Ideas for Outdoor Spaces
Outdoor chandeliers? Yes, please! Think beyond the typical string lights. We're talking about bringing some serious indoor elegance outside. Imagine a chandelier hanging over your patio dining table or illuminating a cozy seating area in your garden. It's all about creating an inviting and magical atmosphere. You can find great kitchen island lights that would work well with this project.
- Consider the style of your outdoor space. Is it rustic, modern, or bohemian? Let that guide your design choices.
- Think about the size of the area where the chandelier will hang. You don't want it to be too big or too small.
- Get creative with materials. Use things like branches, metal, or even repurposed items to make your chandelier unique.
Using Natural Elements
Bringing nature into your outdoor chandelier design is a fantastic way to create a cohesive and organic look. Think about incorporating elements like:
- Twigs and branches: These can be used to create a rustic frame or to add texture to the design.
- Pinecones and leaves: These can be attached to the chandelier for a seasonal touch.
- Crystals and stones: These can add a touch of sparkle and elegance.
Remember to use lightweight materials and secure hanging methods to ensure the safety of your chandelier. Test the weight capacity of your ceiling fixture before hanging the lanterns, and always use appropriate hardware.
Safety Considerations for Outdoor Lighting
Safety is paramount when it comes to outdoor lighting. You're dealing with electricity and the elements, so you need to take precautions. Here are a few things to keep in mind:
- Use outdoor-rated fixtures and wiring. These are designed to withstand moisture and other environmental factors.
- Make sure all electrical connections are properly sealed and protected from the elements.
- Consider using a GFCI (ground fault circuit interrupter) outlet to protect against electrical shock.
DIY Wicker Chandeliers
Wicker chandeliers bring a natural, bohemian touch to any room. They're surprisingly easy to make and can be customized to fit your personal style. I've always loved the texture and warmth that wicker adds to a space, and a DIY chandelier is a great way to incorporate that element without breaking the bank. Plus, it's a fun project to tackle on a weekend!
Gathering Materials
First things first, you'll need to gather your supplies. This is where you can get creative and decide on the size and shape of your chandelier. Here's a basic list to get you started:
- Wicker baskets or hoops (various sizes)
- Pendant light kit (including wiring, socket, and ceiling canopy)
- Light bulb (Edison bulbs look great with wicker!)
- Twine or strong cord
- Hot glue gun and glue sticks
- Scissors or wire cutters
Step-by-Step Instructions
Okay, let's get down to the nitty-gritty. Here's how to assemble your wicker chandelier. Remember to always prioritize safety when working with electricity. If you're not comfortable with wiring, it's best to consult a professional.
- Prepare the wicker: If you're using baskets, you might need to cut or reshape them to achieve your desired look. Use wire cutters or scissors to trim any excess wicker.
- Attach the pendant light kit: Thread the wiring through the center of your wicker structure. Secure the socket to the wicker using hot glue or twine. Make sure it's stable and won't wobble.
- Create the chandelier frame: If you're using multiple wicker hoops or pieces, connect them using twine or strong cord. Experiment with different arrangements until you find a design you like.
- Hang the chandelier: Attach the ceiling canopy to your ceiling according to the instructions included with your pendant light kit. Make sure it's securely fastened. Hang the wicker chandelier from the canopy.
- Install the light bulb: Screw in your chosen light bulb. I recommend Edison bulbs for a warm, vintage feel.
Hanging and Displaying Your Chandelier
Now for the fun part: showing off your creation! Consider these tips for hanging and displaying your new wicker chandelier:
- Placement: Hang your chandelier in a central location, such as over a dining table or in a living room. Make sure it's not too low, or people might bump their heads.
- Height: Adjust the height of the chandelier to suit your space. A good rule of thumb is to leave about 7 feet of clearance from the floor.
- Style: Complement your wicker chandelier with other natural elements, such as plants, wooden furniture, and woven textiles. This will create a cohesive and inviting space.
I love how a simple DIY project can completely transform a room. This weekend, I decided to tackle a wicker chandelier, and it was surprisingly easy! The natural texture adds so much warmth to my dining area, and it was way cheaper than buying one from a store. Plus, I got to customize it to perfectly match my style. Definitely a win-win!
Innovative Wine Bottle Pendant Lights
Selecting the Right Bottles
Okay, so first things first, you need bottles! Don't just grab any old bottle; think about the look you're going for. Do you want all the same color for a uniform vibe, or a mix of different colors for something more eclectic? I started saving wine bottles months ago, but you can also ask friends, family, or even local restaurants to donate their empties. Just make sure you clean them really well. Nobody wants a sticky chandelier. Also, consider the shapes. Different shapes can add a lot of visual interest. I found some cool antique-looking bottles at a flea market that I'm excited to use. Remember to remove all the labels. Soaking them in warm, soapy water usually does the trick, but sometimes you need a little Goo Gone.
Creating the Pendant Design
This is where it gets fun! Think about the overall design. Are you going for a simple, single-tier chandelier, or something more elaborate with multiple levels? I sketched out a few different ideas before settling on one. I'm thinking of a design where the bottles hang at varying lengths to create a more dynamic look. You'll also need to decide how you want to hang the bottles. There are special pendant light kits you can buy that make it easy to attach the bottles to the wiring. Or, if you're feeling extra crafty, you can create your own hanging system using wire or rope. Just make sure it's sturdy enough to support the weight of the bottles. Consider the garden lighting ideas to complement your indoor creation.
Installation Tips for Safety
Carefully thread the wires through the bottles and connect them to the light sockets. Then, mount the chandelier to the ceiling. Make sure it's securely attached to a ceiling joist. You don't want it falling down! Once it's up, screw in the light bulbs and flip the switch. And there you have it: a beautiful, upcycled bottle chandelier!
This project is a great way to add a unique touch to your home while also being environmentally conscious. Plus, it's a fun conversation starter. Just be prepared for everyone to ask you where you got it!
Here are some things to keep in mind:
- Bottle Security: Ensure each bottle is securely fastened to the frame to prevent accidents.
- Weight Distribution: Distribute the weight evenly to avoid strain on the ceiling mount.
- Electrical Safety: Double-check all wiring connections and use appropriate safety measures.
Wrap-Up: Your DIY Lighting Adventure Awaits
So, there you have it! A bunch of cool DIY chandelier ideas that can really change the vibe of your home. Whether you want something rustic with mason jars or a sleek look with pipes, there's a project here for everyone. Don't worry if you're not a pro; these ideas are all about having fun and getting creative. Plus, making your own lighting can save you money and give your space a personal touch. So grab some supplies, get inspired, and let your creativity shine!
Frequently Asked Questions
How can I make my own pendant light?
You can create a pendant light by choosing a unique shade, like a mason jar, and attaching it to a pendant light kit. Then, hang it in your desired spot.
What are some cheap ways to update old lamps?
You can paint old lamps, change the lampshade, or add decorative elements like ribbon or fabric to give them a fresh look.
How can I creatively use string lights indoors?
String lights can be draped over furniture, hung on walls, or placed in jars to create a cozy atmosphere.
Why should I use LED lights in my DIY projects?
LED lights are energy-efficient, last a long time, and come in many colors, making them great for DIY lighting.
How can I include sustainable lighting in my DIY ideas?
You can use recycled materials for your projects and choose energy-efficient lighting options like LED bulbs.
Where can I find materials for my DIY lighting projects?
You can find materials at craft stores, thrift shops, or even around your home by upcycling old items.


1 comment
Rachel
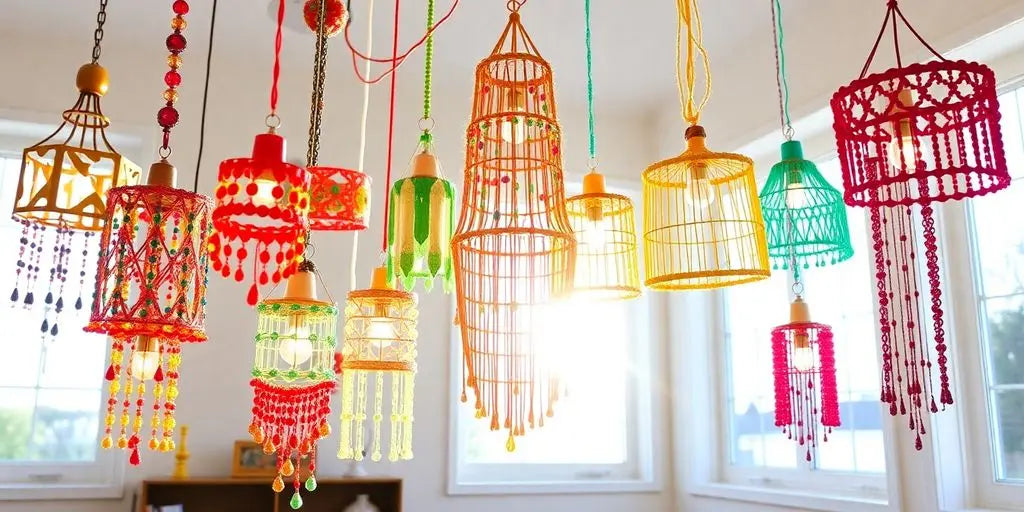
I clicked on the link because there were beautiful colors and different bright pendents but the article says nothing about the ones in the photo. How are those made? That was the only reason i clicked on the profile so its misleading. Or od they are for sale great but nothing is listed about them. Thanks