
Ready to brighten up your space with a brand-new light fixture? Learning how to install a chandelier can seem tricky, but with the right steps and a bit of care, you can do it yourself. This guide will walk you through everything, from making sure you're safe to getting that beautiful light hanging just right.
Key Takeaways
- Always turn off the power at the circuit breaker before you start any work.
- Gather all your tools and materials beforehand to make the process smoother.
- Make sure your ceiling can hold the weight of the chandelier; add extra support if needed.
- Connect wires carefully, matching colors, and use wire nuts for secure connections.
- Test the chandelier after installation to ensure it works correctly and make any final adjustments.
Prioritizing Safety Before Installation
Before you even think about touching that shiny new chandelier, let's talk safety. Seriously, this is the most important part. Messing with electricity can be dangerous, and you don't want to end up with a shocking experience (pun intended!). Plus, you're going to be up on a ladder, possibly dealing with a heavy fixture. So, let's take a few minutes to get everything prepped right. It's way better to be safe than sorry, and a little planning goes a long way.
Turning Off Electrical Power
The very first thing you MUST do is cut the power. I can't stress this enough. Find your electrical panel – it's usually in the basement, garage, or a utility closet. Identify the circuit breaker that controls the room where you'll be working. Flip that breaker to the "off" position. Just to be absolutely sure, test the light switch in the room to confirm the power is indeed off. No lights, no buzzing, nothing. If you're unsure which breaker controls the room, it's better to turn off the main breaker. It's a bit of an inconvenience, but it guarantees your safety. Working with wiring connected to the power supply can be hazardous.
Gathering Essential Tools and Materials
Okay, now that the power is off, let's get our gear together. You don't want to be halfway up the ladder and realize you're missing something. Here's a list of what you'll likely need:
- A sturdy ladder (preferably an A-frame ladder)
- Safety glasses
- Work gloves
- Wire stripper
- Wire connectors (wire nuts)
- Electrical tape
- Screwdrivers (various sizes, including a Phillips head)
- Pliers
- Voltage tester (to double-check the power is off)
- A helper (optional, but highly recommended, especially for heavier chandeliers)
Having all these tools handy will make the job much smoother and safer. Trust me, fumbling around for a screwdriver while balancing on a ladder is not fun.
Assessing Ceiling Support Capacity
This is another critical step. You need to make sure your ceiling can actually hold the weight of the chandelier. Chandeliers can be surprisingly heavy, and you don't want your new fixture crashing down. Check the existing mounting bracket to see if it's securely attached to a ceiling joist. If it's just screwed into drywall, that's not going to cut it. You might need to install a new, sturdier mounting bracket that's properly anchored to a joist. If you're not sure how to do this, it's best to consult a professional. Better safe than sorry, right?
It's always a good idea to double-check everything before you start. Make sure you have all the right tools, the power is off, and the ceiling can support the weight of the chandelier. A little extra preparation can save you a lot of headaches (and potential injuries) down the road.
Preparing the Chandelier and Workspace
Removing the Existing Light Fixture
Okay, so first things first, you gotta take down whatever's up there now. This is usually pretty straightforward, but safety first, always! Make sure the power is OFF at the breaker. Seriously, double-check. Then, it's usually just a matter of unscrewing a few things and gently lowering the old fixture. Have a helper if it's heavy. Don't just let it dangle by the wires! Disconnect the wires carefully, using wire nuts to cap them off if you're not installing the new chandelier right away. Keep all the parts from the old fixture in case you need them later, or if you decide to reinstall it someday. You might want to consider modern crystal chandeliers for your new fixture.
Assembling the Chandelier Components
Most chandeliers come in a bunch of pieces, which can be a little intimidating. Don't panic! Lay everything out on a clean surface and find the instructions. Seriously, read them. They're usually not that bad. Start putting the main parts together, like the frame and the center column. Be gentle, don't force anything. This is where patience comes in handy. Make sure everything is snug but not overtightened. You don't want to strip any screws or crack any delicate parts. This is also a good time to install the chandelier wire.
Attaching the Mounting Bracket Securely
The mounting bracket is what holds the whole thing up, so this is important. The new chandelier should come with a bracket that's compatible with your electrical box. If not, you might need to get a different one. Attach the bracket to the electrical box in the ceiling using the screws that came with it. Make sure it's really secure. Give it a good tug (but not too hard!). If the box feels loose, you might need to reinforce it or call an electrician. You don't want your beautiful chandelier crashing down! Make sure the bracket is flush against the ceiling.
It's a good idea to check the weight rating of your electrical box before you even start. Chandeliers can be surprisingly heavy, and you need to make sure your box can handle the load. If it can't, you'll need to replace it with a heavy-duty box that's designed for heavier fixtures.
Connecting Electrical Wires Safely
Okay, now for the part that might seem a little scary, but it's really not that bad if you take your time and pay attention. We're talking about connecting the electrical wires. This is where you actually make the chandelier work, so let's get it right.
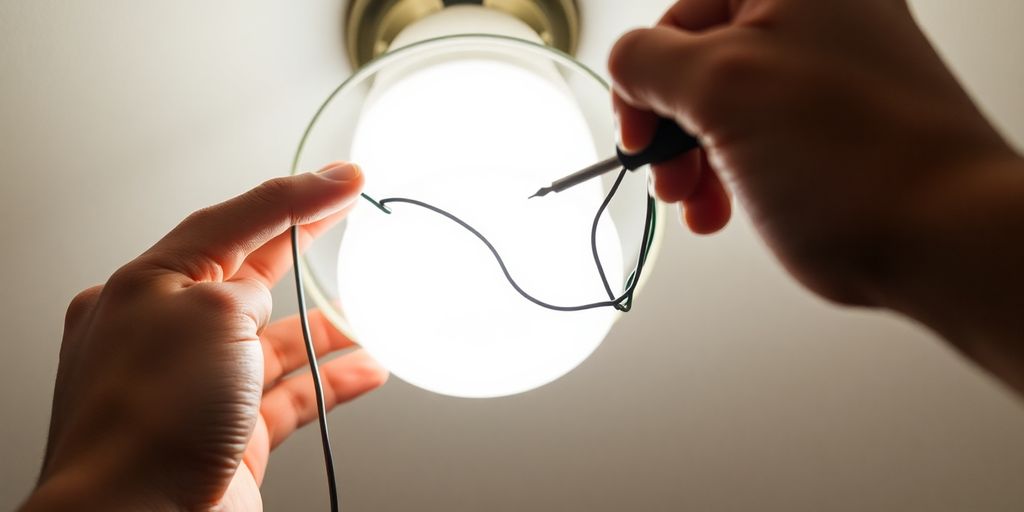
Identifying and Matching Wires
First things first, you gotta figure out which wire is which. Usually, you'll have a black wire (that's your hot wire), a white wire (the neutral one), and a green or bare copper wire (the ground). The wires coming from your ceiling should be the same colors. Matching them up correctly is super important for safety. If you're not sure, don't guess! A voltage tester can be your best friend here. Use it to confirm which wire is hot before you touch anything. If the wires in your ceiling aren't color-coded, or if you're just not sure, call an electrician. Seriously, it's worth the peace of mind.
Securing Wire Connections with Nuts
Alright, so you've figured out which wires go together. Now it's time to connect them. This is where wire nuts come in. These little plastic caps are what you'll use to keep the wires connected safely. Here's the deal:
- Hold the matching wires together, end to end.
- Twist the wire nut onto the wires, turning it clockwise until it's snug.
- Give the wires a gentle tug to make sure they're really secure. You don't want them coming loose later on.
Make sure the wire nuts are the right size for the number and gauge of wires you're connecting. Too small, and they won't hold properly. Too big, and they might not make a good connection. If you're not sure, ask someone at the hardware store. They can help you pick out the right ones.
Tucking Wires Neatly into the Box
Once you've got all the wires connected and secured with wire nuts, it's time to tuck them neatly into the electrical box. This is important for a couple of reasons. First, it keeps the wires out of the way so you can attach the chandelier canopy. Second, it helps protect the wires from damage. Just gently fold the wires into the box, making sure they're not pinched or stressed. You want them to sit comfortably in there. Don't force them! If there's not enough room, you might need a bigger electrical box. Seriously, cramming the wires in there is a fire hazard waiting to happen. Take your time, be gentle, and make sure everything fits without being too tight. Now you're one step closer to having that beautiful new chandelier lighting up your room!
Mounting and Adjusting the Chandelier
Attaching the Chandelier Canopy
Okay, so you've got the wiring done, which is a huge step! Now it's time to make things look pretty. The canopy is that decorative piece that hides all the wires and the electrical box up in the ceiling. Think of it as the chandelier's hat. Here's how I usually do it:
- First, gently slide the canopy up the chain or rod until it sits flush against the ceiling. You want it to completely cover the electrical box and the mounting bracket we installed earlier.
- Next, there should be some screws or a locking mechanism to secure the canopy in place. Use those! Make sure it's snug, but don't overtighten and risk damaging the ceiling or the canopy itself.
- Finally, give it a little wiggle (gently!). It shouldn't move. If it does, something isn't quite right, and you'll want to double-check the screws or locking mechanism.
Determining Optimal Chandelier Height
Height is super important. Too high, and it looks dinky. Too low, and people are bumping their heads. The right height makes all the difference. Here's what I usually consider:
- Room Function: Is it over a dining table? In an entryway? The height changes depending. For dining tables, I aim for about 30-36 inches between the bottom of the chandelier and the tabletop. In open areas, you want at least 7 feet of clearance from the floor.
- Ceiling Height: Obviously, if you have super low ceilings, you can't hang a chandelier super low. Use your best judgement. If you have really high ceilings, you can go a bit higher, but don't get carried away.
- Chain or Rod Length: Most chandeliers come with an adjustable chain or rod. This is your best friend. Play around with it until you find the perfect height. You can always remove links from a chain, but you can't add them back easily, so start longer and shorten as needed.
Securing the Fixture to the Bracket
Alright, almost there! This is where we actually hang the chandelier. Make sure you have a good grip and maybe a helper for this part, especially if it's a heavy fixture. Here's the deal:
- Carefully lift the chandelier and align the mounting hardware (usually a hook or a loop) with the corresponding part on the mounting bracket we installed way back at the beginning.
- Gently attach the chandelier to the mounting bracket. Make sure it's fully engaged and secure. You should hear a click or feel it lock into place.
- Give it another gentle wiggle. This is your last chance to make sure it's really secure. If it wobbles or feels unstable, take it down and double-check everything. Better safe than sorry!
I always double-check the weight rating of the electrical box before hanging a heavy chandelier. It's a pain to have to reinforce it later if it can't handle the weight. Also, make sure the mounting bracket is really, really secure. That's what's holding everything up!
Adding Decorative Elements and Bulbs
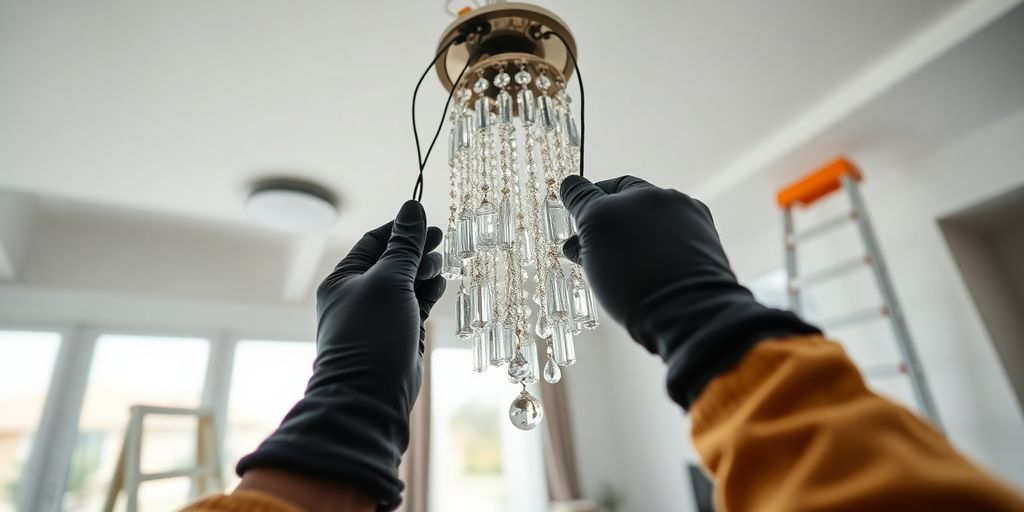
Attaching Crystal Pieces and Embellishments
Okay, so you've got the chandelier up, but it's not quite there yet. Now comes the fun part: adding all those sparkly bits! This is where your chandelier really starts to shine (literally). Most chandeliers come with instructions on how to attach the crystals or other decorative elements. Follow those instructions carefully! It's easy to get turned around and put things in the wrong place.
- Lay out all the pieces before you start.
- Double-check the instructions for each piece.
- Use gloves to avoid fingerprints on the crystals.
Installing Recommended Light Bulbs
Time to put in the light bulbs. Not all bulbs are created equal, and the type you choose can really change the whole vibe of the chandelier. Check the chandelier's specifications for the correct wattage and bulb type. Using the wrong bulb could be a fire hazard, and nobody wants that. I usually keep a few extra bulbs on hand, just in case. You can find some great home decor ideas online.
Considering Energy-Efficient LED Options
Let's talk about LEDs. They're energy-efficient, last a long time, and come in a bunch of different colors and brightness levels. If you're looking to save some money on your electricity bill and reduce your carbon footprint, switching to LED bulbs is a no-brainer. Plus, they don't get as hot as incandescent bulbs, which is a nice bonus. Here's a quick comparison:
| Bulb Type | Lifespan (Hours) | Energy Use | Heat Output |
|---|---|---|---|
| Incandescent | 1,000 | High | High |
| LED | 25,000+ | Low | Low |
I switched all the bulbs in my house to LEDs last year, and I've already noticed a difference in my energy bill. Plus, I don't have to change them nearly as often. It's a win-win!
Finalizing Installation and Testing
Restoring Electrical Power
Okay, so you've got everything wired up and the chandelier is hanging there, looking pretty. Now comes the slightly nerve-wracking part: turning the power back on. Make sure your hands are dry and you're not touching any part of the fixture. Head back to your breaker box and flip the breaker you switched off back to the "on" position. Take a deep breath – you're almost there!
Testing Chandelier Functionality
With the power back on, it's time to see if all your hard work paid off. Flip the light switch and watch that chandelier light up! If it doesn't, don't panic. Turn the breaker off again immediately and double-check all your wiring connections. Make sure those wire nuts are on tight and that no bare wire is exposed. If it does light up, congratulations! But don't celebrate just yet; give it a few minutes to make sure there's no flickering or buzzing. If you notice anything weird, kill the power and investigate. You might want to check out some bedroom chandeliers for inspiration for your next project.
Making Final Adjustments and Cleaning
Assuming everything is working perfectly, now's the time to make any final adjustments. Does the chandelier hang straight? Is the canopy flush with the ceiling? If your chandelier has a chain, you might want to adjust the length to get it just right. Once you're happy with the position, give the chandelier a good cleaning. Dust off any fingerprints or smudges, and admire your handiwork. You might want to consider energy-efficient LED options for your new chandelier.
Installing a chandelier isn't exactly rocket science, but it does require patience and attention to detail. If you followed all the steps carefully, you should now have a beautiful new light fixture that will brighten up your home for years to come. If you ever feel unsure about any part of the process, don't hesitate to call a qualified electrician. It's always better to be safe than sorry!
Here's a quick checklist to make sure you've covered everything:
- Power is restored safely.
- Chandelier lights up without flickering or buzzing.
- Fixture hangs straight and is securely attached.
- All parts are clean and free of smudges.
Conclusion
So, putting up a chandelier can really make your place look good. If you follow these steps and keep safety in mind, you can get it done without a problem. If things get tricky or you're not sure about something, just call a licensed electrician. They can help you out. Then, you can just enjoy how nice your new chandelier makes your home feel!
Frequently Asked Questions
How do I make sure the power is off before I start?
Before you do anything, go to your home's main electrical box and flip the switch that controls the power to the light fixture you're working on. Use a special tool called a voltage tester to double-check that the power is truly off. This is super important to keep you safe!
What tools do I need to install a chandelier?
You'll need a few things: a sturdy ladder, screwdrivers (both flat and Phillips head), wire cutters, wire nuts, electrical tape, and that all-important voltage tester. Sometimes, a level and pliers can also come in handy.
How can I tell if my ceiling can hold a chandelier?
First, look at the weight of your new chandelier. Then, check your ceiling to see if it has a strong enough support beam or a special box that can hold that weight. If you're not sure, it's always best to have a professional electrician check it out to avoid any problems.
What's the right height to hang a chandelier?
The general rule for a dining room is to hang the chandelier about 30 to 36 inches above the table. For other rooms, make sure the bottom of the chandelier is at least 7 feet off the floor so people don't bump their heads.
How do I connect the electrical wires correctly?
Most chandeliers have three types of wires: black (hot), white (neutral), and green or bare copper (ground). You'll connect the black wire from the chandelier to the black wire from the ceiling, white to white, and ground to ground. Use wire nuts to secure these connections tightly.
When should I call a professional for help?
If you're not comfortable with electrical work, or if your chandelier is very heavy and needs extra support, it's a good idea to hire a licensed electrician. They can make sure everything is installed safely and correctly, following all the rules.


