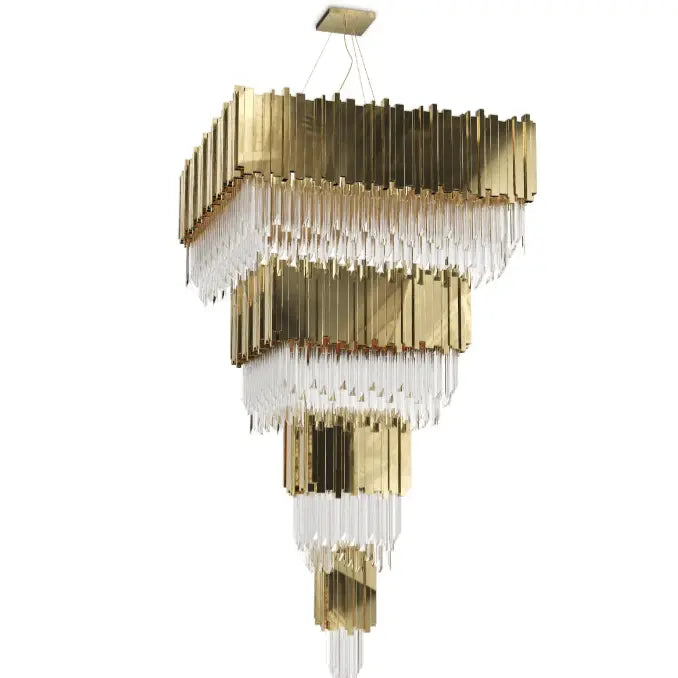
Installing a chandelier might seem like a big job, but with the right steps, it’s totally doable for the average homeowner. Whether you’re upgrading your dining room or adding a touch of elegance to your entryway, wiring a chandelier can be a rewarding project. In this guide, we’ll break down everything you need to know to safely and effectively wire and hang your chandelier.
Key Takeaways
- Always turn off the power at the circuit breaker before starting any electrical work.
- Make sure to use the right tools and assess your ceiling’s strength to handle the chandelier’s weight.
- Understand the wiring colors and connections to match them correctly for a safe setup.
- Securely fasten all components, including the canopy and chain, to avoid any wobbling or instability.
- Test the chandelier thoroughly after installation to ensure it’s working properly and safely.
Preparing for Chandelier Wiring
Turning Off the Power Safely
Before you even think about touching a wire, turn off the power. Locate your home's circuit breaker and switch off the breaker that controls the room where you'll be working. Double-check the power is off by using a voltage detector—this small tool is a lifesaver when it comes to avoiding electrical shocks. Never skip this step; your safety depends on it.
Gathering Essential Tools and Materials
Having the right tools on hand makes everything smoother. Here's a quick checklist:
- Screwdrivers (Phillips and flathead)
- Wire strippers
- Voltage detector
- Electrical tape
- Wire connectors (also called wire nuts)
- Ladder or step stool
Gathering these items ahead of time means fewer interruptions and a more efficient process. If you're missing something, now's the time to grab it.
Assessing the Ceiling Strength
Before hanging anything, check if your ceiling can handle the weight of the chandelier. Most chandeliers come with a weight specification—compare this to the capacity of your ceiling mount or electrical box. If necessary, reinforce the area with a ceiling brace or consult a professional for advice. A solid foundation ensures your chandelier stays secure and safe for years to come.
Taking the time to prepare thoroughly will save you headaches down the line. A little extra effort now prevents costly mistakes later.
Understanding Chandelier Wiring Basics

Identifying Wire Types and Colors
When wiring a chandelier, it’s important to understand the wire types and their color coding. Typically, you’ll find three main wires: the live wire, the neutral wire, and the ground wire. The live wire is usually black or red, the neutral wire is white, and the ground wire is green or bare copper. This color system helps ensure proper connections and safe operation. Always double-check the manufacturer’s instructions, as some chandeliers may use different wire colors.
Using Wire Connectors Effectively
Wire connectors, often called wire nuts, are small but essential tools for joining wires securely. To use them:
- Strip about ¾ inch of insulation off the wire ends.
- Twist the wires together in a clockwise direction.
- Screw on the wire connector until it feels tight. Give it a gentle tug to confirm it’s secure.
This step not only ensures a solid electrical connection but also reduces the risk of exposed wires, which can lead to electrical hazards.
Ensuring Proper Grounding
Grounding is a safety measure that protects you and your home from electrical faults. The ground wire connects the chandelier to the home’s grounding system, directing stray electrical currents safely into the ground. To ground your chandelier:
- Locate the green or bare copper wire from the ceiling.
- Attach it to the chandelier’s ground wire using a wire connector.
- Secure the connection to the mounting bracket, if required.
Proper grounding is not optional—it’s a critical step for safe chandelier operation and compliance with electrical codes.
Step-by-Step Wiring Process
Connecting the Wires Securely
To start, make sure all wires are properly matched—neutral to neutral, live to live, and ground to ground. This step is critical for both safety and functionality. Use wire connectors to tightly secure each connection, avoiding loose ends that could cause electrical faults. Double-check the manufacturer's instructions for guidance specific to your chandelier model.
Attaching the Canopy and Chain
Once the wiring is complete, move on to attaching the canopy and chain. Start by threading the wires through the chain links and canopy. Secure the canopy to the ceiling bracket, ensuring it sits flush against the ceiling. Adjust the chain length if needed to achieve the desired chandelier height.
Testing the Electrical Connections
Before finalizing the installation, always test the electrical connections. Turn the power back on at the circuit breaker and use a voltage detector to confirm everything is functioning properly. Flip the light switch to check if the chandelier illuminates as expected. If there are issues, double-check the wire connections and consult the manual for troubleshooting tips.
Taking the time to carefully test and adjust during this phase ensures your chandelier operates safely and beautifully in your space.
Adjusting and Securing the Chandelier

Adjusting the Height for Optimal Placement
Getting the height just right is a game-changer for how your chandelier looks and functions. First, figure out the room's dimensions and what kind of vibe you're going for. A dining room chandelier, for example, should hang around 30-36 inches above the table. If it's in a foyer, aim for at least 7 feet of clearance from the floor. The key is to balance aesthetics with practicality. Use the chain or rod to adjust the height, and take your time to ensure it’s straight and centered.
Ensuring Stability and Balance
Nobody wants a wobbly chandelier—it’s unsafe and distracting. To secure it, double-check the mounting hardware and make sure everything is tightened properly. If your chandelier uses a chain, the links should be evenly spaced to avoid tilting. For heavier fixtures, consider using additional support, like a ceiling brace. Always give it a gentle shake to confirm it’s stable before moving on.
Inspecting for Safety
Safety checks are a must before calling the job done. Look over the wires to ensure there’s no damage or exposed sections. Check that all connections are snug and insulated. If your chandelier has multiple arms, make sure they’re all aligned and not loose. Finally, test the light by flipping the switch—if everything lights up without flickering, you’re good to go.
Finalizing the Installation
Testing the Chandelier for Functionality
Before calling the installation complete, flip the power back on and see if your chandelier lights up as expected. Check every bulb to make sure it illuminates without flickering. If something doesn’t seem right, revisit the wiring connections to ensure everything is secure. This is also a good time to confirm the light is evenly distributed in the room and there are no unexpected shadows or dim spots.
Cleaning Up the Installation Area
Once you're happy with the chandelier's performance, clean up the mess. Remove tools, packaging, and any stray screws or wires. A clean space not only looks better but also keeps everyone safe. Nobody wants to step on a rogue nail or trip over a leftover tool. Plus, it gives the chandelier its moment to shine—literally and figuratively.
Making Final Adjustments
Take a step back and look at the chandelier from different angles. Is it hanging straight? Does the height feel right for the room? If something feels off, now’s the time to fix it. Adjust the chain or canopy as needed to get the perfect balance. This final step ensures your new lighting centerpiece is as functional as it is beautiful.
Troubleshooting Common Wiring Issues
Identifying Loose Connections
Loose connections are one of the most common issues when it comes to chandelier wiring. A wobbly connection can cause flickering lights or even pose a fire hazard. Start by turning off the power at the breaker box to ensure safety. Then, inspect each wire connection to confirm they’re securely fastened. Use a screwdriver to tighten any loose screws on wire terminals. If you find wire nuts that are not snug, remove them, re-twist the wires, and replace the nut securely.
Addressing Flickering Lights
Flickering lights can be a sign of several problems, from loose bulbs to voltage fluctuations. Begin by checking that all bulbs are screwed in tightly. If the flickering persists, test the chandelier with a voltage detector to rule out inconsistent power supply. Replace any damaged wires or connectors you find during this process. If the issue continues, it may be time to consult an electrician to evaluate the circuit for deeper issues.
Ensuring Consistent Power Supply
A chandelier that doesn’t stay consistently lit might not be receiving stable power. First, verify that the circuit breaker hasn’t tripped. If the breaker is fine, inspect the wiring for signs of wear, such as fraying or discoloration. Replace any compromised wires immediately. Sometimes, the issue could stem from the wall switch. Test the switch by toggling it on and off several times or replacing it altogether. For more reliable lighting, consider upgrading to modern sconces or flush mounts that are easier to maintain and troubleshoot.
Wrapping It Up
So, there you have it—everything you need to know to tackle chandelier wiring like a pro. It might seem a little intimidating at first, but with some patience and the right tools, it’s totally doable. Just remember to take your time, double-check your work, and always put safety first. By following these steps, you’ll not only have a stunning chandelier lighting up your space but also the satisfaction of knowing you did it yourself. Now go ahead, flip that switch, and enjoy the glow!
Frequently Asked Questions
What tools do I need to install a chandelier?
You'll need a screwdriver, wire strippers, a voltage tester, electrical tape, and possibly a ladder. Make sure to gather these before starting.
How do I safely turn off the power before wiring?
Locate your home's circuit breaker and switch off the breaker that controls the room where you'll install the chandelier. Use a voltage tester to confirm the power is off.
What should I do if my ceiling can't support the chandelier's weight?
You might need to install a ceiling brace or reinforce the area to safely support the chandelier's weight.
How do I connect the wires correctly?
Match the wires by color—black to black, white to white, and green or copper to the grounding wire. Use wire connectors to secure them tightly.
Why is my chandelier flickering after installation?
Flickering could be caused by loose wire connections or a faulty bulb. Double-check the wiring and try replacing the bulb to fix the issue.
Can I install a chandelier without professional help?
Yes, with basic electrical knowledge and the right tools, you can install a chandelier yourself. However, if you're unsure, it's best to consult a licensed electrician for safety.


