
Updating a chandelier can be a fun and affordable way to give your space a fresh look. Whether you're tired of the same old lighting or just want to add a personal touch, there are plenty of creative options that won't break the bank. From painting and decorating to repurposing and adding new shades, you can transform your chandelier into a stunning centerpiece. Let's explore some budget-friendly ideas to breathe new life into your lighting!
Key Takeaways
- Consider painting your chandelier for an instant refresh.
- Add decorative elements like crystals or fabric for a unique touch.
- Repurpose items like mason jars to create a fun DIY chandelier.
- New shades can completely change the look of your chandelier.
- Engage with DIY communities to share your transformation and get inspired.
Revamping Your Chandelier With Paint
Choosing The Right Paint
Okay, so you're thinking about painting your chandelier? Awesome! First things first: the paint. Don't just grab any old can. For metal chandeliers, spray paint is usually the way to go. It gives a smooth, even finish that's hard to beat with a brush. Look for paints specifically designed for metal; they'll adhere better and last longer. Also, think about the finish you want. Do you want something shiny, matte, or maybe a bit of both? Rustoleum Universal Metallics Spray Paint is a good option. And before you even crack open the can, give your chandelier a good wipe-down to get rid of any dust or, you know, dead bugs. Trust me, it makes a difference.
Creating Ombre and Gradient Effects
Want to get a little fancy? Ombre or gradient effects can seriously upgrade your chandelier. The idea is to transition from a light color at the top to a darker shade at the bottom, or vice versa. You can do this with spray paint or regular paint and a brush. If you're using spray paint, apply light coats, gradually building up the color. With a brush, blend the colors carefully to avoid harsh lines. It might take a little practice, but the result is a total showstopper. This is a great way to embrace timeless charm and add a pop of color to your space.
Using Metallic Finishes
Metallic finishes can give your chandelier a whole new vibe. Gold, silver, bronze – they all add a touch of glam. You can go all-out with one metallic color, or mix and match for a more interesting look. For example, paint the main body of the chandelier in a matte color and use metallic paint on the accents. Just remember to use light coats and let each coat dry completely before adding another. And don't forget to tape off any areas you don't want to get paint on, like the light bulb sockets. Painter’s tape is your friend here!
Incorporating Decorative Elements
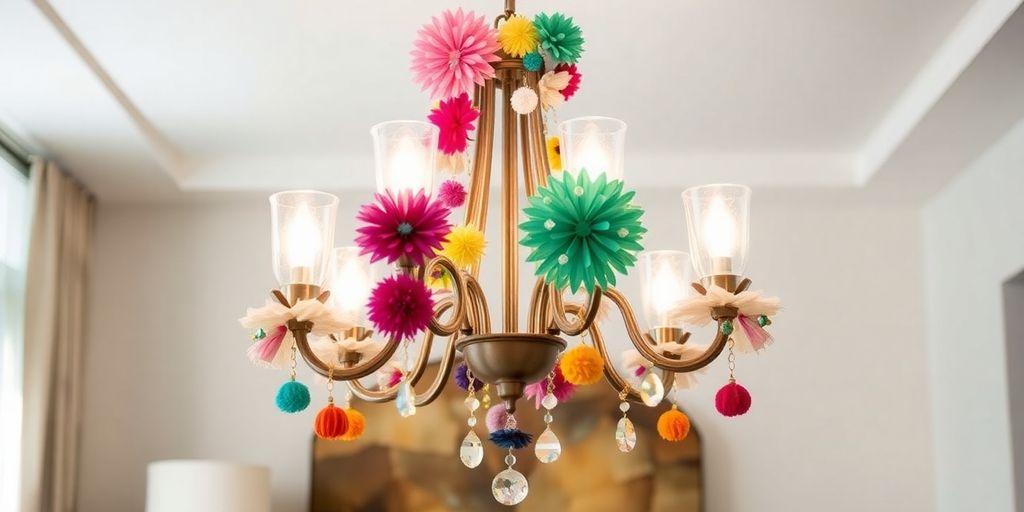
Adding Crystals and Beads
Adding crystals and beads is a great way to really change the look of your chandelier. It can go from plain to pretty fancy pretty quickly. You don't have to spend a ton either; craft stores and online shops usually have some affordable options. I like to use thin wire to attach the beads, just wrapping them around the chandelier arms. If you're going for a more classic vibe, think about using intricate metalwork with the crystals. It's all about what fits your style!
Using Twine and Fabric Wraps
If you're aiming for something more rustic or maybe even a bit boho, twine and fabric wraps are your friends. It's a pretty simple way to add texture and a different kind of visual interest. You can wrap the twine tightly for a neat look or a bit looser for something more relaxed. For fabrics, think about using something that complements the room's color scheme. It's a fun way to achieve a Boho Chic home decor style without spending a fortune.
Attaching Vintage Finds
Okay, this is where things can get really interesting. Hit up some flea markets or antique stores and see what you can find. Old keys, interesting pieces of metal, even small vintage toys can be attached to a chandelier for a super unique look. It's all about finding things that speak to you and incorporating them in a way that feels natural. Just make sure whatever you're attaching isn't too heavy, you don't want to risk the chandelier's stability.
I think the best part about adding decorative elements is that you can really let your personality shine. Don't be afraid to experiment and try different things until you find something that you absolutely love. It's your space, so make it your own!
DIY Chandelier Makeover Ideas
Transforming With Mason Jars
Okay, so I saw this idea online and thought it was super cool. You can actually turn a regular chandelier into something amazing using mason jars! It sounds a little crazy, but trust me, the results can be stunning. Basically, you're replacing the traditional shades or bulbs with mason jars. You can leave them clear for a rustic look, or you can paint them, add some decorative elements, or even fill them with fairy lights. It's a really fun way to add some personality to your dining room or kitchen. I think the best part is that mason jars are pretty cheap, so it's a budget-friendly way to get a unique light fixture.
Creating A Hummingbird Feeder Chandelier
This is definitely one of the more out-there ideas, but it's perfect if you love birds and want to add a whimsical touch to your outdoor space. The basic idea is to convert an old chandelier into a hummingbird feeder. You'll need to remove the electrical components, of course, and then attach small hummingbird feeders to each arm of the chandelier. Make sure everything is secure and that the feeders are easy to clean and refill. It's a great way to repurpose an old fixture and attract some beautiful birds to your yard. Just be prepared for a lot of buzzing around your head!
Repurposing Old Fixtures
Don't throw away that old, outdated chandelier! There are so many ways to give it new life. One idea is to strip it down to its bare bones and then rebuild it with a completely different style in mind. You could paint it a bright color, add some funky beads, or even wrap it in twine for a more rustic look. Another option is to use parts of the chandelier to create something completely new. For example, you could take the arms and turn them into candle holders or use the crystals to make a mobile. The possibilities are endless, so get creative and see what you can come up with. You might be surprised at what you can create with a little imagination and some elbow grease. Here are some ideas:
- Paint it a bold color.
- Add unique beads or crystals.
- Wrap it in twine or fabric.
Repurposing old fixtures is not only a great way to save money, but it's also a sustainable way to decorate your home. By giving old items new life, you're reducing waste and creating something truly unique.
Lighting Up Your Space With New Shades
Selecting The Perfect Shade
Okay, so you're thinking about new chandelier shade ideas? Awesome! First, think about the size of your room. A huge shade in a tiny room? Not a good look. Too small of a shade in a big room? It'll get lost. Also, consider the color. Do you want something that pops, or something that blends in? Light colors make a room feel bigger, while dark colors can make it feel cozier. And don't forget the material! Fabric shades give off a softer light, while metal shades can be more modern. It's all about finding that sweet spot.
DIY Shade Covering Techniques
Want to really personalize your chandelier? Try covering the existing shades yourself! It's easier than you think, and you can totally transform the look. Here's how:
- Choose your fabric: Velvet, silk, burlap – whatever floats your boat. Make sure it's big enough to cover the shade with a little extra for folding.
- Cut and attach: Cut the fabric to size, leaving an inch or two extra. Use fabric glue or a hot glue gun to carefully attach the fabric to the shade, folding over the edges for a clean finish.
- Add embellishments: Ribbon, beads, fringe – go wild! This is where you can really let your personality shine.
I remember this one time I tried covering a lampshade with some old wallpaper I had lying around. It looked amazing... for about a week. Then the wallpaper started peeling off. Turns out, you need to use the right kind of glue! Learn from my mistakes, people.
Mixing And Matching Styles
Don't be afraid to mix and match styles! Who says all the shades on your chandelier have to be the same? Try using different colors, patterns, or materials to create a unique and eclectic look. Here's a table to get you started:
| Shade Style | Material | Color | Ambiance |
|---|---|---|---|
| Drum | Linen | White | Soft, diffused |
| Empire | Silk | Gold | Warm, elegant |
| Cone | Metal | Black | Modern, dramatic |
Budget-Friendly Chandelier Updates
Thrifting For Unique Pieces
Thrifting is a fantastic way to find unique chandelier components or even entire chandeliers at a fraction of the retail price. Don't be afraid to visit your local thrift stores, flea markets, and antique shops. You might stumble upon a vintage frame that can be repurposed or a set of crystals that can add sparkle to your existing fixture. The key is to look beyond the current state of the item and envision its potential with a little bit of creativity and elbow grease. You can find some amazing unique pieces if you are patient.
Cost-Effective DIY Solutions
Updating a chandelier doesn't have to break the bank. There are plenty of DIY solutions that can transform your fixture without costing a fortune. Consider these ideas:
- Spray Paint: A fresh coat of paint can completely change the look of your chandelier. Choose a metallic finish for a touch of glamour or a bold color to make a statement.
- Beads and Crystals: Add inexpensive beads or crystals to the chandelier arms for extra sparkle and visual interest. Craft stores often have sales on these items.
- Fabric Scraps: Wrap fabric scraps around the chandelier arms to add texture and color. This is a great way to use up leftover fabric from other projects.
Remember, the goal is to be creative and resourceful. Look around your home for materials that you can repurpose or upcycle. With a little imagination, you can create a stunning chandelier update without spending a lot of money.
Upcycling Old Fixtures
Before you toss out that old, outdated chandelier, consider upcycling it into something new and exciting. Here are a few ideas to get you started:
- Mason Jar Chandelier: Replace the existing shades with mason jars for a rustic, farmhouse-inspired look.
- Hummingbird Feeder Chandelier: Transform the chandelier into a unique hummingbird feeder by adding small dishes of nectar to the arms.
- Repurpose the Frame: Remove all the existing components and use the frame as a base for a completely new design. You could create a mobile, a plant hanger, or even a piece of wall art. You can even try a chandelier makeover!
Enhancing Your Chandelier's Ambiance
Choosing The Right Bulbs
Okay, so you've got this awesome chandelier, right? But the wrong bulbs can totally kill the vibe. Think about it: harsh, bright lights can make a room feel sterile, while dim, yellow lights might make it feel like a dungeon. I usually go for something in between – a soft, warm light that makes everyone look good. You know, like candlelight, but without the fire hazard. Also, consider the bulb type. LEDs are great because they last forever and don't use a ton of energy. Incandescent bulbs give off a classic glow, but they burn out fast. Halogen bulbs are somewhere in the middle. Experiment a little and see what works best for your space. Don't be afraid to try different wattages too!
Layering Light For Effect
Layering light is where it's at! Don't just rely on your chandelier to do all the work. Think about adding some lamps around the room to create a more inviting atmosphere. Floor lamps are great for adding height and drama, while table lamps can soften things up. You could even add some string lights for a touch of whimsy. The key is to have different sources of light at different levels. This will create depth and dimension, and make your room feel super cozy. I like to have a mix of overhead lighting, task lighting, and accent lighting. That way, I can adjust the lighting to suit my mood. For example, if I'm reading, I'll turn on a table lamp next to my chair. If I'm having a party, I'll dim the chandelier and turn on some accent lights. It's all about creating the right mood. A cozy living room decor is all about the lighting.
Using Dimmer Switches
Dimmer switches are a game-changer. Seriously, if you don't have them, get them. They're super easy to install, and they give you so much control over the lighting in your room. With a dimmer switch, you can adjust the brightness of your chandelier to suit any occasion. Having a romantic dinner? Dim the lights way down. Need to focus on work? Crank them up. It's all about flexibility. Plus, dimmer switches can save you money on your energy bill. When you dim the lights, you're using less electricity. It's a win-win!
I remember when I first installed dimmer switches in my living room. It was like magic! Suddenly, I could create the perfect ambiance for any situation. Movie night? Dim the lights. Game night? Brighten them up. It was so easy, and it made such a big difference. I highly recommend it!
Sharing Your Chandelier Transformation
So, you've poured your heart and soul into revamping that old chandelier. Now what? Time to show it off! Here's how to share your masterpiece with the world.
Documenting The Process
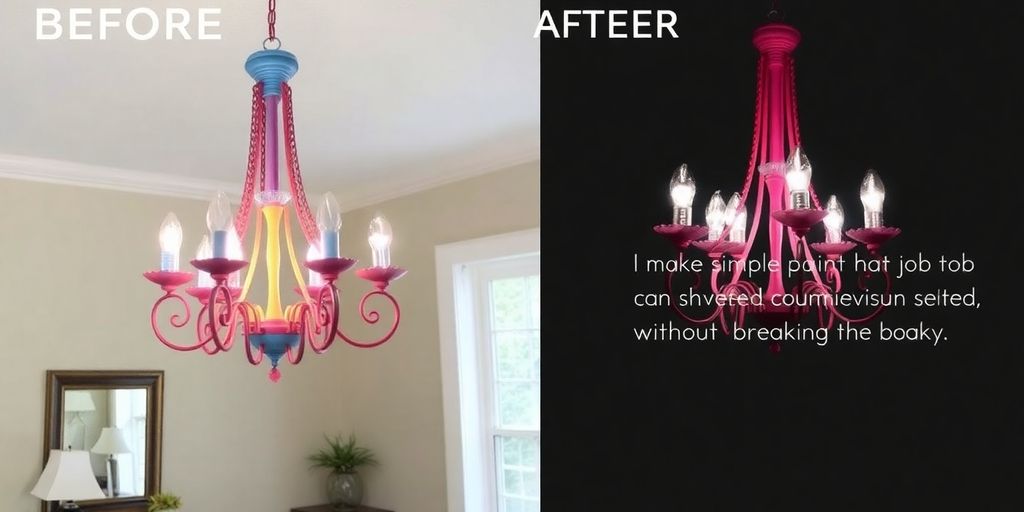
Before you even think about the final reveal, make sure you've captured the journey. I'm talking before, during, and after photos. Nobody believes a transformation happened without proof, right? Plus, documenting the process helps others see how they can tackle a similar project. Think about it: a quick snapshot of the initial state versus the final, gleaming product can be super inspiring.
Engaging With DIY Communities
Online DIY communities are goldmines for feedback, inspiration, and maybe even a little bit of bragging rights. Find forums, groups, or social media pages dedicated to DIY projects and share your chandelier makeover. Be prepared to answer questions about your process, materials, and any challenges you faced. It's a great way to connect with like-minded people and get some fresh ideas for your next project.
Showcasing Before And After Photos
The ultimate reveal is all about the before and after. Create a visually appealing side-by-side comparison that highlights the dramatic change. Use good lighting and angles to really showcase the details of your updated chandelier. Consider adding a short description of the project, including the materials used and any tips or tricks you learned along the way. This is your chance to shine and inspire others to try their hand at a chandelier transformation.
Don't be shy about sharing your project! Whether it's a simple paint job or a complete overhaul, your chandelier transformation is a testament to your creativity and resourcefulness. Sharing your experience can inspire others to embrace DIY projects and transform their own spaces on a budget.
Wrap-Up: Your Chandelier Makeover Awaits
Updating your chandelier doesn’t have to be a big, expensive project. With a little imagination and some basic supplies, you can turn a tired old fixture into something fresh and eye-catching. Whether you decide to paint it, add some bling with crystals, or even go for a rustic vibe with twine, the options are endless. Plus, you’ll save some cash while creating a piece that truly reflects your style. So, gather your materials, roll up your sleeves, and get started on your chandelier transformation today!
Frequently Asked Questions
How can I pick the right chandelier for my room?
First, think about the size and style of your room. Make sure the chandelier fits well with your decor and matches your budget.
What should I do before I start painting my chandelier?
Carefully take the chandelier apart and clean all the pieces. Get your tools and materials ready to help the paint stick better.
Can I use any kind of paint on my chandelier?
It's best to use spray paint for a smooth finish. You can also use metallic or matte paints, but make sure it's suitable for the material of your chandelier.
How can I decorate my chandelier?
You can add crystals and beads for a fancy touch, or use twine and fabric to give it a rustic look. Vintage items can also be attached for a unique style.
What are some budget-friendly ways to update a chandelier?
You can thrift for unique pieces, use inexpensive DIY solutions, or upcycle old fixtures to create something new.
How do I share my chandelier makeover with others?
Once you've finished your project, take photos of the process and the final look. Share them on social media and connect with DIY communities for feedback and inspiration.


