
Want to brighten up your place without spending a ton of cash? Making your own chandelier can be a fun way to add some personality to any room. There are so many cool chandelier diy ideas out there, whether you like a cozy, rustic feel or something super modern. Let's check out some easy and creative projects that will make your home shine!
Key Takeaways
- You can make your own chandeliers using everyday stuff like glass jars, wood, or even old bottles.
- Match your chandelier to your home's look by picking colors and styles that fit.
- Always be careful with electricity; if you're not sure, get help from someone who knows what they're doing.
- Using old things for your chandelier saves money and makes your piece truly one-of-a-kind.
- Don't be afraid to try out different shapes and designs to make your chandelier stand out.
Charming Mason Jar Chandelier DIY Ideas
Mason jar chandeliers? I know, it might sound a little out there, but trust me, they can actually look amazing! I've been seeing them pop up all over the place, and I finally decided to give it a shot myself. It's way simpler than you'd think, and the end result is this super charming, rustic vibe that I'm totally loving. Plus, you get to customize it to fit your space, which is always a win in my book. It's a great way to add some creative DIY home decor to your space.
Creating a Cozy Atmosphere with Mason Jars
Okay, so the whole point of a mason jar chandelier is to make your space feel warm and inviting. Think about the kind of light you want. Do you want it bright and functional, or more of a soft, ambient glow? I went for the latter. Using warm-toned bulbs is key here. It instantly makes the room feel more relaxed. You can also play around with the placement of the jars to control how the light is distributed. I staggered mine a bit to create some interesting shadows.
- Use warm-toned bulbs for a cozy glow.
- Stagger jar placement for interesting shadows.
- Consider the overall brightness you want to achieve.
I found that dimmable bulbs were a game-changer. Being able to adjust the brightness depending on the mood is fantastic. Plus, it helps save energy!
Selecting the Right Jars for Your Chandelier
Not all mason jars are created equal, people! Think about the size, shape, and color. Do you want all the jars to match, or do you want a more eclectic look? I went with a mix of clear and slightly frosted jars for some variety. You can find these at most hardware stores or even online. Then, you'll need your mason jars, some wire, and light sockets. Basically, you're wiring the sockets to the frame and then using the wire to hang the mason jars from the frame. Make sure everything is secure before you start adding bulbs! You can find a upcycled mason jar pendant light tutorial online if you need more help.
Wiring and Assembly for Mason Jar Chandeliers
Alright, let's get down to the nitty-gritty. Here's a basic rundown of how to put one of these bad boys together. First, you'll need a chandelier frame. You can find these at most hardware stores or even online. Then, you'll need your mason jars, some wire, and light sockets. Basically, you're wiring the sockets to the frame and then using the wire to hang the mason jars from the frame. Make sure everything is secure before you start adding bulbs! I even saw one where someone stuffed garden lighting into the jars, and it looked amazing!
Elegant Wine Bottle Chandelier DIY Ideas
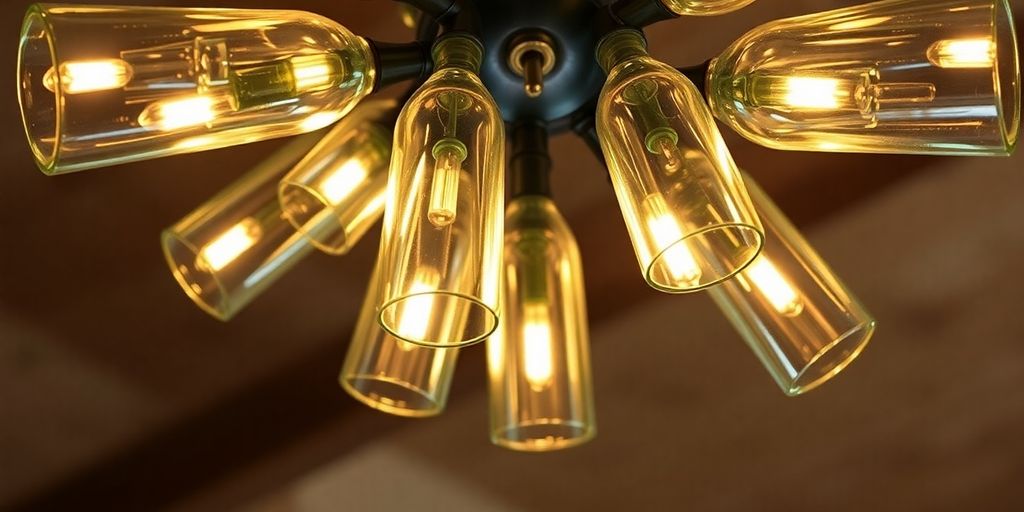
Preparing Wine Bottles for Chandelier Use
Okay, so you want to make a wine bottle chandelier? First, you need bottles! Don't just grab any bottle; think about the look you're going for. Do you want all the same color for a uniform vibe, or a mix of different colors for something more eclectic? I started saving wine bottles months ago, but you can also ask friends, family, or even local restaurants to donate their empties. Just make sure you clean them really well. Nobody wants a sticky chandelier. Also, consider the shapes. Different shapes can add a lot of visual interest. I found some cool antique-looking bottles at a flea market that I'm excited to use. Remember to remove all the labels. Soaking them in warm, soapy water usually does the trick, but sometimes you need a little Goo Gone. You can find modern chandeliers if you don't want to make your own.
Designing the Frame for Your Wine Bottle Chandelier
This is where it gets fun! Think about the overall design. Are you going for a simple, single-tier chandelier, or something more elaborate with multiple levels? I sketched out a few different ideas before settling on one. You'll also need to decide how you want to hang the bottles. There are special pendant light kits you can buy that make it easy to attach the bottles to the wiring. Or, if you're feeling extra crafty, you can create your own hanging system using wire or rope. Just make sure it's sturdy enough to support the weight of the bottles. Consider the garden lighting ideas to complement your indoor creation.
Safety Considerations for Wine Bottle Chandeliers
Carefully thread the wires through the bottles and connect them to the light sockets. Then, mount the chandelier to the ceiling. Make sure it's securely attached to a ceiling joist. You don't want it falling down! Once it's up, screw in the light bulbs and flip the switch. And there you have it: a beautiful, upcycled bottle chandelier! I think using eco-friendly homes is a great idea.
This project is a great way to add a unique touch to your home while also being environmentally conscious. Plus, it's a fun conversation starter. Just be prepared for everyone to ask you where you got it!
Here are some things to keep in mind:
- Bottle Security: Ensure each bottle is securely fastened to the frame to prevent accidents.
- Weight Distribution: Distribute the weight evenly to avoid strain on the ceiling mount.
- Electrical Safety: Double-check all wiring connections and use appropriate safety measures.
Rustic Wood and Pipe Chandelier DIY Ideas
Choosing Wood and Pipe Materials
Okay, so you're thinking about a rustic wood and pipe chandelier? Cool! First, you need to gather your materials. For the wood, reclaimed wood is awesome because it already has that weathered, rustic look. Barn wood or even thick branches can work. If you're buying new wood, consider pine or cedar, and you can always distress it yourself with some sandpaper and stain. For the pipes, black iron pipes are the go-to for that industrial vibe. You can find them at most hardware stores. Make sure you get different lengths and fittings to create the shape you want. Don't forget safety glasses and gloves when working with these materials!
Here's a quick list to get you started:
- Wood planks or branches
- Black iron pipes (various lengths and fittings)
- Screws or nails
- Wood stain (optional)
Assembling Your Rustic Chandelier Frame
Alright, time to put this thing together! Start by laying out your wood pieces to form the base of your chandelier. You can create a square, rectangle, or even a circular shape. Use wood glue and screws to secure the joints. Next, attach the black iron pipes to the wooden base using flanges. These will act as the arms of your chandelier. Make sure everything is level and sturdy. This is the most important step to ensure the chandelier is safe and looks good. You might need to adjust the pipe lengths and fittings to get the look you want. Remember to pre-drill holes before screwing into the wood to prevent splitting. For unique chandelier ideas, consider adding extra decorative elements like chains or metal accents.
Integrating Lighting into Wood and Pipe Designs
Now for the fun part: adding the lights! You can use pendant lights, Edison bulbs, or even string lights. If you're using pendant lights, run the wires through the pipes and attach the sockets to the ends. Edison bulbs look great with this style, giving off a warm, vintage glow. If you're using string lights, wrap them around the wood and pipes for a more whimsical look. Make sure all the wiring is done safely and securely. If you're not comfortable working with electricity, it's always best to consult a professional electrician. Here are some things to keep in mind:
- Use UL-listed wiring and sockets.
- Ensure all connections are secure.
- Consider using a dimmer switch to control the brightness.
Remember, safety first! Always turn off the power before working with any electrical components. If you're unsure about anything, don't hesitate to ask for help. A well-lit and stylish chandelier is worth the effort, and it'll add a ton of character to your space.
Modern Geometric Chandelier DIY Ideas
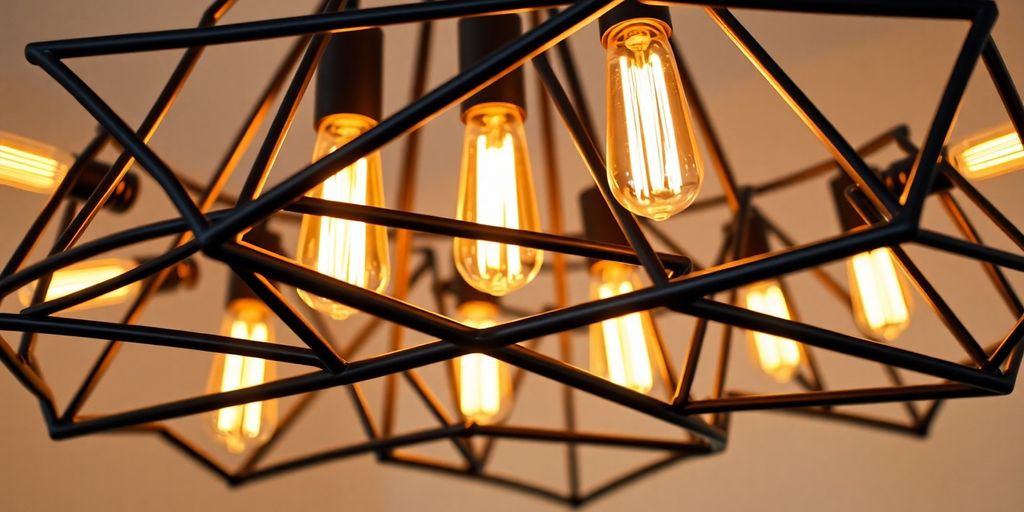
Designing Geometric Shapes for Your Chandelier
When you're thinking about modern geometric chandeliers, the shapes you pick really set the tone. Forget basic circles and squares. Think about dodecahedrons, icosahedrons, or even just cool, asymmetrical arrangements. It's all about clean lines and bold shapes. The key is to plan your design carefully and make sure everything is securely connected.
Material Selection for Modern Chandelier DIY
For materials, metal is a great choice – think sleek steel, brushed brass, or even painted iron. Wood can add warmth, but keep the lines clean. Acrylic is another option for a lighter, more translucent look. Don't be afraid to mix and match! A metal frame with acrylic accents can be super striking. You can find chandelier parts at most hardware stores.
Incorporating LED Lights into Geometric Designs
LEDs are the way to go for modern chandeliers. They're energy-efficient, long-lasting, and come in a ton of different colors and brightness levels. You can use LED strip lights to highlight the frame itself, or individual LED bulbs for a more traditional chandelier look. Just make sure you plan your wiring carefully and use the right connectors. Also, consider using a dimmer switch to control the light intensity and create different moods.
Here are some things to keep in mind:
- Plan your wiring carefully.
- Use the right connectors.
- Consider a dimmer switch.
Modern geometric chandeliers are all about clean lines, bold shapes, and innovative materials. Don't be afraid to experiment and create something truly unique. It's a chance to add a real statement piece to your home.
Simple Beaded Chandelier DIY Ideas
Choosing Beads and Hoops for Your Chandelier
Okay, so you want to make a beaded chandelier? Awesome! First, you'll need some stuff. Obviously, you'll need beads. Think about the size and shape you want. Big chunky ones? Small delicate ones? A mix? It's all up to you. The type of beads you choose will dramatically impact the overall look of your chandelier. Consider the following options:
- Crystals: Add a touch of elegance and sparkle. They can be a bit pricier, but the effect is stunning.
- Wooden Beads: Perfect for a more rustic or bohemian vibe. You can paint or stain them to match your decor.
- Glass Beads: Come in a huge variety of colors and shapes. They're a good middle-ground option in terms of price and style.
You'll also need a frame. A metal hoop works great, or even a sturdy wire wreath form. Don't forget to consider the size of the hoop in relation to the space where the chandelier will hang. A small hoop might get lost in a large room, while a huge hoop could overwhelm a small space. You can find metal hoops at most craft stores in various sizes. A sturdy wire wreath form can also work well, especially if you want a more organic shape.
Stringing Techniques for Beaded Chandeliers
Alright, let's get building! First, if you're painting or staining anything, do that now and let it dry completely. Next, attach your string or wire to the hoop. Fishing line is strong and clear, but wire can give it a more industrial look. There are a few different ways to string the beads, and the technique you choose will affect the final look of your chandelier.
- Random Stringing: Simply string the beads onto the wire in a random order. This is the easiest method and creates a relaxed, eclectic look.
- Patterned Stringing: Create a pattern with the beads, such as alternating colors or sizes. This requires a bit more planning but can result in a more polished look.
- Layered Stringing: String beads in multiple layers, creating a fuller, more dramatic effect.
Don't be afraid to experiment with different stringing techniques to see what you like best. You can also mix and match techniques to create a unique design. Remember to leave enough space between the beads so that the light can shine through.
Adding Light Sources to Beaded Creations
Now for the fun part: adding the light! You'll need a light kit – you can get these at most hardware stores. Make sure the light kit is compatible with the type of beads you're using. For example, if you're using delicate glass beads, you'll want to use a low-wattage bulb to avoid overheating. Here are a few tips for incorporating light sources:
- Center Light: The most common option is to place a single light source in the center of the chandelier. This provides a balanced, even light.
- Multiple Lights: For a brighter chandelier, consider using multiple light sources. You can arrange them in a circle around the center of the hoop.
- Fairy Lights: For a whimsical, romantic look, try stringing fairy lights throughout the beads. This creates a soft, diffused light.
Finally, make sure all wiring is done safely and correctly. If you're not comfortable with electrical work, hire a qualified electrician. Safety first! Consider browsing for living room lights to complement your new creation!
Upcycled Material Chandelier DIY Ideas
Transforming Everyday Items into Chandeliers
Okay, so you want a chandelier but don't want to spend a fortune? Upcycling is your answer! It's all about taking something old and giving it a new, stylish life as a chandelier. Think beyond the usual store-bought fixtures and consider what you already have. An old kitchen colander can become a surprisingly chic pendant light, casting interesting shadows. Or how about transforming a collection of vintage teacups into a whimsical, cascading chandelier? The possibilities are truly endless, and the result is a unique piece that reflects your personality.
Creative Uses for Repurposed Materials
Let's brainstorm some materials! Glass bottles are a classic choice. Wine bottles, beer bottles, even old soda bottles can be strung together to create a colorful and eye-catching chandelier. Metal cans, like paint or coffee cans, can be turned into industrial-style lights. Old lampshades can get a makeover with new fabric or paint. Wooden pallets? Perfect for rustic wall sconces or even a full-blown chandelier. Get creative with eco-friendly homes, and don't be afraid to experiment.
Here's a quick list to get you started:
- Glass Bottles: Create a colorful, layered effect.
- Metal Cans: Achieve an industrial, edgy look.
- Old Lampshades: Customize with fabric and paint.
- Wooden Pallets: Build a rustic, statement piece.
Upcycling isn't just about saving money; it's about being creative and reducing waste. It's a win-win. You get a cool light, and the planet gets a little break.
Securing Upcycled Elements in Your Design
Safety first! When working with upcycled materials, make sure everything is securely fastened. For bottle chandeliers, ensure each bottle is properly attached to the frame to prevent accidents. Distribute the weight evenly to avoid strain on the ceiling mount. And, of course, double-check all wiring connections and use appropriate safety measures. If you're not comfortable with electrical work, consider getting help from a qualified electrician. You don't want your beautiful, upcycled chandelier to become a hazard. Using LED bulbs is also a great idea to minimize heat and energy consumption.
Wrapping It Up: Your DIY Lighting Journey
So, there you have it! A bunch of cool DIY chandelier ideas that can really change the vibe of your home. Whether you want something rustic with mason jars or a sleek look with pipes, there's a project here for everyone. Don't worry if you're not a pro; these ideas are all about having fun and getting creative. Plus, making your own lighting can save you money and give your space a personal touch. So grab some supplies, get inspired, and let your creativity shine!
Frequently Asked Questions
What stuff do I need to make a DIY chandelier?
You'll typically need things like wood, metal pipes, beads, and light parts. Don't forget tools like drills and safety gear.
How can I make sure my chandelier is safe?
Always follow the rules for electrical safety. If you're not sure, ask a professional electrician for help.
Can I make my chandelier look how I want it to?
Totally! You can pick colors, shapes, and materials that fit your home's look.
Where can I find the stuff for my chandelier project?
You can find materials at craft stores, hardware stores, or even by using old things you already have at home.
How do I hang my chandelier so it stays up safely?
Make sure to use strong hangers and hooks that can hold the weight of your chandelier. If you're not sure, get help from a pro.
Can I use LED lights in my homemade chandelier?
Yes, using LED lights is a great idea! They save energy and come in many different styles and colors.


