
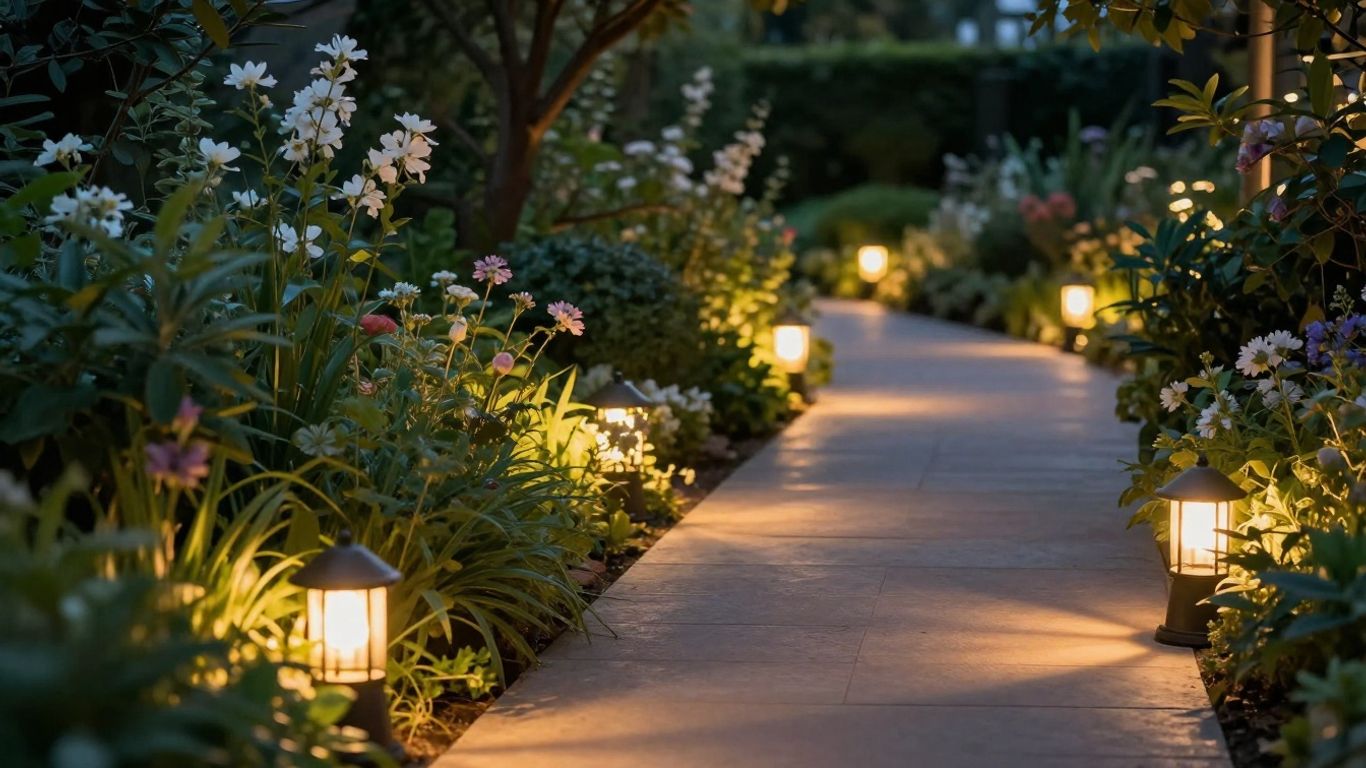
Your outdoor space doesn't have to disappear when the sun goes down. With a few well-placed low voltage garden light fixtures, you can turn your yard into a safe, inviting, and beautiful place to enjoy in the evening. This guide is here to help you figure out the best way to get your low voltage garden light system up and running, making your outdoors shine.
Key Takeaways
- Low voltage garden light systems are safer and use less energy than traditional lighting, making them a great choice for homeowners.
- Planning is key: sketch your yard, decide where lights will go, and calculate your total wattage needs before buying anything.
- There are many types of low voltage garden light fixtures, like path lights, spotlights, and well lights, each serving a different purpose.
- Proper installation includes correctly setting up the power pack, running wires safely underground, and securing fixtures, while avoiding common mistakes like bad connections.
- Regular maintenance, like cleaning fixtures and checking wires, will keep your low voltage garden light system working well for years.
Understanding Low Voltage Garden Light Systems
Why Choose Low Voltage Landscape Lighting
When the sun goes down, your yard doesn't have to disappear into darkness. Low voltage landscape lighting is a fantastic way to keep your outdoor spaces usable and beautiful after dusk. It's a safer, more energy-friendly option compared to the standard 120-volt systems you find indoors. Think about it: running on just 12 volts means you don't have to worry about getting a shock if you accidentally nick a wire while gardening. Plus, these systems sip power, making them kind to your electricity bill. It's a project that many homeowners can tackle themselves, avoiding the need for an electrician in most cases. Whether you want to light up a garden path, highlight a favorite tree, or just make your patio more inviting for evening get-togethers, low voltage lighting offers a flexible and practical solution. For a deeper look at the advantages, you might want to check out our overview on low voltage deck lighting.
Key Components of Your Lighting System
Setting up a low voltage lighting system is pretty straightforward, mainly involving three main parts. First, you have the power pack, which is basically a transformer. Its job is to take the regular 120-volt power from your house and step it down to a safe 12-volt current for your lights. For LED lights, a smaller power pack (around 45-300 watts) is usually enough. If you're using older halogen bulbs, you'll need a beefier one, maybe 600-1200 watts. Then there's the low voltage cable, often called landscape wire, which carries the power from the transformer to your fixtures. Finally, you have the light fixtures themselves – these can be anything from path lights and spotlights to well lights and deck lights. You'll also need connectors to join the wire to the fixtures, and maybe a timer or photocell to automate when the lights turn on and off.
Benefits of Low Voltage Outdoor Lighting
Low voltage outdoor lighting offers a lot of perks that make it a popular choice for homeowners. For starters, it's incredibly energy-efficient. Because it uses much less power than standard voltage systems, your electricity costs stay lower. Safety is another big win; the lower voltage significantly reduces the risk of electrical shock, making it much safer to install and live with, especially if you have kids or pets running around. Installation is generally simpler too, often a DIY-friendly project that doesn't require professional help. This can save you money on labor costs. Plus, the lifespan of modern LED low voltage lights is impressive, often lasting 10-15 years or more, meaning fewer replacements and less hassle over time. It's a smart investment for both your wallet and your peace of mind.
When planning your layout, think about how you actually use your outdoor space. Do you entertain on the deck? Do you often walk the dog down the garden path after dark? Consider placing lights where they'll be most useful, not just where they look pretty. Safety and usability should go hand-in-hand with aesthetics.
Here's a quick look at what you might need:
- Power Pack (Transformer): Converts 120V to 12V.
- Low Voltage Cable: Carries power to fixtures.
- Light Fixtures: Path lights, spotlights, etc.
- Connectors: To join wires.
- Tools: Wire strippers, screwdriver.
Choosing the right components is key to a system that works well and lasts. For instance, using brass or copper fixtures, while a bit more expensive upfront, tends to hold up much better against the elements than cheaper plastic or aluminum options, much like investing in quality home decor pays off in the long run.
Planning Your Low Voltage Garden Light Layout
Alright, so you've decided to add some sparkle to your yard with low voltage lights. That's awesome! But before you start digging or buying anything, we really need to talk about planning. It sounds a bit boring, I know, but trust me, a little bit of thought now saves a whole lot of headaches later. Think of it like drawing a map before you go on a road trip – you wouldn't just wing it, right?
Sketching Your Outdoor Space
First things first, grab a piece of paper and a pencil. Draw out your yard. Don't worry about making it a masterpiece; a simple bird's-eye view is perfect. Mark down the main features: your house, the driveway, any big trees, garden beds, patios, decks, or pathways. This sketch is your blueprint. It helps you see the whole picture and figure out where lights would make the most sense. It’s also a good place to jot down any existing features you want to highlight, like a cool-looking shrub or a nice stone wall.
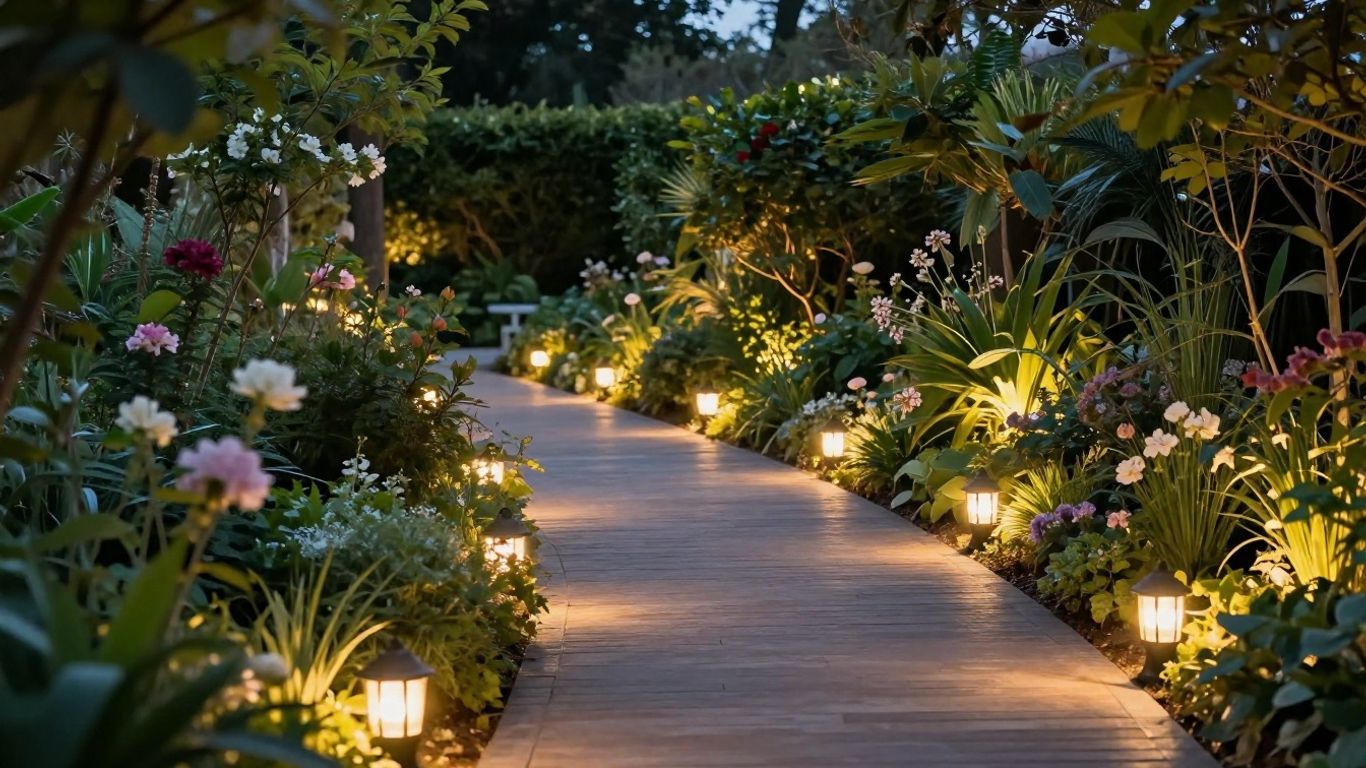
Strategic Light Placement Ideas
Now for the fun part: deciding where the lights will go. Think about what you want to achieve. Do you need to light up a dark pathway for safety? Want to spotlight that majestic oak tree in the backyard? Or maybe create a cozy ambiance on your patio for evening get-togethers? Here are a few ideas to get you started:
- Path Lights: Line your walkways and garden paths. This is great for safety and also makes your paths look inviting.
- Spotlights/Uplights: Aim these at trees, large shrubs, or architectural features. You can angle them slightly upward to highlight textures without causing glare.
- Area Lights: These can provide broader illumination for patios, decks, or seating areas.
- Downlights: Mount these high up, like in a tree or under an eave, to mimic natural moonlight. This creates a really soft, diffused effect.
Remember to hide the light source itself whenever possible; you want to see the beautiful light, not the fixture.
A common mistake is placing lights too close together, creating a harsh, over-lit look. Aim for a more subtle approach where light and shadow play together. Think about how you want the light to fall and what mood you're trying to create. It's about accentuating, not just illuminating.
Calculating Total Wattage Needs
This is where we get a little bit math-y, but it's super important. You need to make sure your transformer can handle all the lights you plan to use. Each light fixture has a wattage rating (how much power it uses). You'll need to add up the wattage of all the lights you intend to install.
Here’s a simple table to help you keep track:
| Fixture Type | Quantity | Wattage per Fixture | Total Wattage | Notes |
|---|---|---|---|---|
| Path Light | 6 | 3W | 18W | For garden path |
| Spotlight | 2 | 7W | 14W | To highlight trees |
| Area Light | 1 | 5W | 5W | For patio |
| Grand Total | 37W |
Once you have your grand total, you need to pick a transformer that's rated higher than this. A good rule of thumb is to choose a transformer that's about 20-30% larger than your total calculated wattage. This gives you some wiggle room if you decide to add more lights later on. So, for our example above (37W), a 50W or 60W transformer would be a safe bet. Overloading your transformer is a surefire way to have dim lights or even damage the transformer itself. You can find some great modern options for transformers that offer extensive customization to perfectly fit your space.
Selecting the Right Low Voltage Garden Lights
Choosing the right fixtures is where your garden lighting plan really starts to take shape. It’s not just about picking pretty lights; it’s about finding the ones that do the job you need them to do, look good, and last.
Essential Outdoor Fixture Types
Low voltage systems offer a bunch of different fixture styles, each with its own purpose. You've got your basic path lights, which are great for lining walkways and driveways. Then there are spotlights, perfect for highlighting trees, statues, or architectural details. Bollard lights offer a bit more presence and can be used for both path illumination and general area lighting. Don't forget well lights, which are installed in the ground and shine upwards, creating a really dramatic effect without the fixture itself being visible. Finally, deck and step lights are smaller, often flush-mounted, and designed for safety and ambiance on patios and stairways.
Choosing Fixtures for Different Areas
Think about what you want each light to do. For a garden path, you'll want something that casts a gentle, downward glow to guide the way without blinding anyone. Path lights are usually the go-to here. If you're trying to make that big oak tree in your backyard pop, a spotlight angled upwards is your best bet. For a patio area where you'll be relaxing, maybe some subtle uplighting from the ground or a few well-placed bollards would create a nice mood. Consider the scale of your space; don't put tiny lights in a huge yard or massive fixtures in a small garden. For example, when choosing porch lights, aim for a size that's proportionate to your door, perhaps one-third the height for a single fixture [6dd7].
Understanding Light Beam Patterns
Lights don't all spread light the same way. Some have a very focused, narrow beam, which is ideal for spotlighting a single object from a distance. Others have a wider, more diffused beam, good for general area lighting or illuminating a broader space like a flower bed. You'll also find lights with adjustable beams, giving you flexibility. When you're looking at fixtures, check the specifications for beam angle or spread. This will help you figure out how far apart you can place them and what kind of coverage you can expect. It's all about getting the right effect without creating dark spots or overly bright glare.
DIY Installation of Low Voltage Garden Lights
Ready to bring your lighting plan to life? Let’s walk through how to install landscape lighting together. First, double-check that all power is off and round up your tools – you’ll need wire strippers, a trusty shovel, and a voltage meter. Remember, safety first!
Installing the Power Pack
Your power pack, also known as a transformer, is like the heart of your lighting system – it needs just the right spot to keep everything running smoothly. Mount it about a foot above the ground, with plenty of breathing room all around. Keep it at least 30 feet from any water features, and pick a spot that won’t get too hot in the summer sun. Getting started is straightforward: pop out the knockout plug with your screwdriver, slide in the terminal adapter, and lock it down with the terminal ring clamp. Mark your mounting spot carefully, drill your anchor holes, and mount that power pack nice and straight.
Running and Connecting Wires
Time to dig those trenches! Your wires need a cozy home about 6 inches underground – but it’s always a good idea to check your local building codes, as they might want them buried deeper. A smart tip is to leave about 5 feet of extra wire at both ends of your run. You’ll thank yourself later when you’re making those final tweaks or need to adjust things. Now for the connections – strip back that wire insulation just half an inch. Hook up your power pack by putting one wire in the common terminal (COM) and its partner in either the 12V or 15V spot. Got a shorter run with just a few lights? The 12V tap is your friend. Longer distance with more lights? Go for that 15V connection. Pro tip: Leave an extra 3 feet of wire at each light fixture location. Your future self will thank you when those plants grow bigger or you want to move things around. For bigger yards, consider breaking up your system into smaller runs of 100-150 watts each to manage voltage drop.
Mounting and Positioning Fixtures
Here’s where the fun begins! Set up all your lights temporarily first – think of it like a dress rehearsal before the big show. Those wire connections need to stay dry, so use silicone-filled waterproof connectors for every single one. This is super important to prevent corrosion and ensure your lights work for years to come. Position your lights according to your plan, aiming them to highlight features or illuminate pathways. Double-check that all connections are secure and weatherproof before burying any wires.
Water and electricity don’t mix, so those buried connections need special care. Think of waterproof connectors as raincoats for your wiring – they keep moisture out and prevent rusty surprises. Every connection needs proper waterproofing, just like every outdoor adventure needs good rain gear.
Here’s a neat trick for beam spread: multiply your beam angle by 0.018, then by the distance to find your light spread. For example, a 120-degree flood light 15 feet away creates a lovely 32.4-foot light pool. Narrow beams make sculptures pop, while wide beams create even lighting across larger spaces. If you're looking for inspiration on fixture types, exploring options for external porch lights can give you ideas for different styles and functionalities.
Avoiding Common Low Voltage Garden Light Mistakes
So, you've planned your layout, picked out some snazzy fixtures, and you're ready to bring your garden to life after dark. That's awesome! But before you start digging and connecting, let's chat about a few common slip-ups that can turn your bright idea into a dim disappointment. Getting these right from the start saves you a lot of hassle down the road.
Wiring and Connection Errors
This is where things can get a bit tricky if you're not careful. Water and electricity are a bad combo, right? So, any connections you bury need to be super secure and waterproof. Think of waterproof connectors like little raincoats for your wires – they keep moisture out and stop corrosion before it starts. Every single connection point needs this protection. It might seem like overkill, but trust me, it's way easier to do it right the first time than to dig everything up later to fix a corroded wire.
When you're dealing with a larger system, say more than 10 lights or wires stretching over 100 feet, a voltmeter becomes your best friend. It's like a little detective that tells you if the power is flowing correctly. Don't skip this check; it's a simple step that makes sure everything is working as it should.
Fixture Placement Pitfalls
Where you put your lights matters more than you might think. You want to highlight your plants and features, not create blinding glare. A common mistake is just sticking lights wherever there's a bit of space. Instead, try tucking fixtures into flower beds or mulch. This hides the source and makes the light itself the star. For open areas, well lights can be a good choice. And remember your lawnmower – placing lights out of its path saves them from accidental damage.
Avoid the "runway effect" with path lights. Instead of lining them up in a perfectly straight line, let them follow the natural curves of your path with a gentle zigzag. It looks much more organic and inviting.
Also, think about accessibility. You want your lights to look magical, but you also need to be able to reach them for cleaning or bulb changes. So, hide them well, but not too well!
Addressing Voltage Drop Issues
This one's a bit technical, but it's super important for 12-volt systems. As electricity travels along the wire, it loses a little bit of its power – that's voltage drop. The longer the wire run, the more power it loses. This can lead to lights at the end of the line being dimmer than those closer to the power source.
- The 100/100 Rule: A good guideline is to not exceed 100 watts of lighting load for every 100 feet of 12-gauge cable. Stick to this, and you'll keep your lights shining brightly.
- Wire Gauge: Using the correct gauge wire is key. Thicker wire (like 10-gauge) can carry power further with less loss than thinner wire (like 14-gauge).
- Hub Wiring: Instead of daisy-chaining lights one after another, consider a "hub" method. This means running wires from the power pack to each light or group of lights individually. It might use a bit more wire, but it helps distribute power more evenly and makes troubleshooting easier. For more on planning your system, check out low voltage cable.
Paying attention to these details will help you create a beautiful, functional, and long-lasting garden lighting system that you can enjoy for years to come.
Maintaining Your Low Voltage Garden Light System
Keeping your outdoor lights looking good and working right doesn't have to be a big chore. Think of it like tending to a garden; a little regular attention goes a long way in keeping everything vibrant and functional. Consistent upkeep prevents small issues from becoming big, expensive headaches later on.
Regular System Checks
It’s a good idea to give your lights a quick once-over every month or so. Grab a soft cloth and wipe down the fixtures to get rid of dust and grime that can dim their glow. Pay special attention to the glass lenses – sometimes they get chalky or show water spots, which really blocks the light. It’s also smart to check on your timers or photocells to make sure they’re doing their job.
Here’s a quick rundown of what to look for:
- Wipe down lenses and reflectors.
- Trim back any plants that are growing too close to the fixtures.
- Make sure all wire connections are still snug.
- Check that timers and photocells are working correctly.
- Look for any signs of wear on the wires.
- Clear away leaves or mulch that might be covering the lights.
- Straighten up any lights that have started to lean.
Don't forget to think about the seasons. Spring is a good time to see if winter weather did any damage, and fall is when you want to get things ready for colder months. Ground lights especially need good drainage, so make sure that's clear.
Cleaning and Bulb Replacement
Over time, dirt and debris can build up on your light fixtures, making them look dull and reducing their brightness. A simple cleaning every few months can make a huge difference. Use a soft cloth or sponge with some mild soap and water. For tougher spots on glass lenses, a gentle cleaner might be needed, but always rinse thoroughly. If you notice a bulb flickering or going out, it’s probably time for a replacement. High-quality LED lights can last for years, sometimes up to 10-15 years, but even they eventually need changing. When replacing bulbs, make sure you're using the correct type and wattage for your fixture. For inspiration on different fixture styles, you might want to check out some Nordic modern outdoor wall lights.
When to Call the Professionals
While most maintenance is pretty straightforward, there are times when it’s best to call in someone who knows their stuff. If you suddenly have a bunch of lights not working all at once, that’s a sign something bigger might be going on. Stubborn issues with voltage drop that you can't figure out, or if you suspect damage to underground wires, are also good reasons to get professional help. If you're planning a major upgrade or expansion of your system, a pro can make sure it's done right. It’s better to be safe and get expert advice than to risk further damage or safety hazards.
Sometimes, the simplest solutions are overlooked. Before calling for help, double-check the most obvious things like loose connections or a tripped breaker. Many common problems can be fixed with a few minutes of careful inspection and a simple adjustment.
Your Yard, Illuminated
So, there you have it. Installing low voltage garden lights might seem like a big job at first, but it’s totally doable. You can really change how your yard looks and feels after dark, making it safer and way more inviting. Plus, it’s not as complicated as you might think, and you can save some cash doing it yourself. Now you’ve got the know-how to pick out the right lights, figure out where they should go, and get them set up. Go ahead, give your outdoor space that evening glow-up it deserves. It’s a weekend project that’ll keep on giving.
Frequently Asked Questions
What makes low voltage garden lights safer than regular ones?
Low voltage lights use only 12 volts, which is much less than the 120 volts from your home's outlets. This lower power makes them safer to handle and install, greatly reducing the risk of getting an electric shock.
Can I add more lights to my system later?
Yes, you absolutely can! As long as your power pack (transformer) has enough power left, you can easily connect more lights to your existing setup. It's like adding more branches to a tree.
How far apart should I place my path lights?
For most garden paths, placing path lights about 10 to 14 feet apart works well. This spacing provides enough light to guide you without being too bright or creating a 'runway' effect.
What's the best way to connect the wires for my lights?
Using waterproof connectors filled with silicone is key, especially for any connections that might get wet. This keeps moisture out and prevents rust, ensuring your lights work reliably.
How long do LED garden lights usually last?
High-quality LED lights are quite durable and can often last for 10 to 15 years or even longer with basic care. They shine for a very long time compared to older types of bulbs.
What should I do if one of my lights doesn't turn on?
Don't worry, this is usually a simple fix! The most common reason is a loose wire connection. Double-check all the connections, especially where the wires meet the light fixture and the power pack.


